Showing posts with label tutorials. Show all posts

Saturday, December 7, 2013

DIY Party Girl

Since we're getting in the thick of the swank shindig season, I thought I'd share some of the tutorials that I've found lately for some posh (but super inexpensive) sartorial stylings:

http://www.cottonandcurls.com/2012/12/diy-tulle-skirt-tutorial/
I love this super-easy and inexpensive tulle skirt project from Cotton and Curls. Ever want to sport a poofy skirt like Carrie from the opening of Sex in The City? Now you can!

http://sealoquesea.wordpress.com/2011/12/04/pinning/
Another terrific bargain project is this scarf from Sea Lo Que Sea's blog, taking inspiration from an $1100 piece.

http://www.impatientlycrafty.com/2012/11/30/how-to-make-your-own-sassy-glitter-shoes-on-the-cheap-and-what-not-to-do/
Lindsay over at Impatiently Crafty gives a great tutorial for glitter shoes. The best part? She also gives some great examples of what NOT to do.

http://www.purlbee.com/the-purl-bee/2009/5/21/mollys-sketchbook-fathers-day-tie.html
If your (or your partner's) style is a bit more on the butch end of the spectrum, there's always this necktie project from The Purl Bee. Not only could you do this in ANY woven fabric pattern or solid, you could also customize your fabric with a DIY screen print using Mod Podge with this tutorial from Better Homes and Gardens.
http://www.bhg.com/decorating/do-it-yourself/fabric-paper-projects/how-to-screen-print/

Thursday, November 28, 2013

Upcycled earring display

During the summer, I’d found a chrome laundry hamper frame and decided to salvage it to use as a display piece at shows.  Since it was too new- looking to fit with the rest of my fixtures, I gave it a couple of coats of iron paint followed by a wash of salted vinegar to rust it. I hung it on a chain from one of the beams under the hayloft at the Holy Hill Art Farm Market in October, and used clothespins to attach earring cards to create sort of an “earring chandelier” for my booth. Using a swivel clip at the end of the chain also allowed it to be turned by the customer to show all sides.

 (forgive the grainy camera phone shot, this is my only photo of the piece in action in this incarnation)
While it worked wonderfully as a hanging piece, I knew I wouldn’t usually have a ceiling to hang it from at most shows and it would take up a lot of space as a tabletop piece. I needed to figure out a way of making it freestanding.

I found this coat rack at Goodwill for $4.99 and hit upon an idea. The rack comes apart in sections, each with an upright screw post to attach it to the next. This would make it easy to break down for transporting to and from shows.

I removed the top portion with the coat pegs and added a scrap craft plaque (thrifted) that I'd stained to match the coat rack, screwed into the top post. Between this plaque and another, I added a lazy susan mechanism (salvaged) which would allow the display to rotate. The hamper then rests on top, with four upright screws between the cross supports of the hamper. These upright screws fit into holes in another plaque on top of the stack and are secured using easy-to-remove wing nuts.

 This top plaque not only holds the hamper to the coat rack base, but also allows it to be removed for events where I can use it in “chandelier” form. The wing nuts also provide a socket to hold signage for the rack. 

Here we have the new rounder "in action" at the Holiday Craftacular in Madison last weekend. 

Unfortunately, I managed to crack one of the legs when a tote fell against it in my car, so I had to McGuyver a packing tape solution on-site. A bit of wood glue, a screw, and a clamp to hold it until the glue sets and it'll be back in the game for the next event!

Friday, September 13, 2013

Cassette tape case to retro valise


I found a couple of these 1970s hard shell cassette tape carrying cases at the thrifts a while back for about a dollar each (Yay Value Village!). After removing the cracked plastic dividers, I lined the case with some dusty plum drapery fabric (also thrifted). Easy project and it'll make a nifty display for my upcoming shows.


  •  Don't forget to take a peek at the clothing and housewares sections of the shop/sale when scouting for boxes and cases. Often you can find repurposable velvet garments and other textiles at a fraction of the price that you'd pay for the fabric at a craft store.

Thursday, September 12, 2013

Repurposed revolving necklace rack


 A quickie project from yesterday:


About a month ago, I found this lamp as-is at a local thrift for $.90 ($1.80 on a half-off day). With hanging wires and an altogether Bordello Baroque look, its appeal was probably lost on most folks...but I snatched it up IMMEDIATELY. It's a hollow but heavy cast metal, so I knew it would make a sturdy base for *something*. I also picked up a battered tart plate for $.25 (again...$.50, with the half-off special).


Wiring removed, a swivel and screw pegs added from my hardware stash, the whole thing painted with some on-hand oil enamel...and I have a new revolving necklace rack for next weekend's show. With the wide flat top, I can also use this as a pedestal for a bowl of charms or signage.

Not bad for a $1.15 outlay!

Tuesday, September 3, 2013

Mirror Mirror... (Aging Tutorial)


 Photo via HomeIdeasMag.com

 I’ve long loved the look of old mirrors, that effect of random pitting and flaking of the silvering, which shows little glimpses of the backing material. While I could always find actual antique mirrors for my purposes, they’re often A) rather expensive and B) hit and miss to be able to find just the right size/shape/weathering level for a particular project. I knew that there had to be a way of recreating this look and, after a bit of researching, I discovered that there’s actually two main techniques:
THE EASY WAY:

This involves using mirror effect spray paint and vinegar to create a sort of mercury glass look on plain clear glass. While this tutorial doesn’t explore this, I think that this might be interesting to try on a blue or other coloured transparent glass thrift store find (keeping my eye out for a red bowl amid the Holiday sales) to create a coloured mercury glass look.

THE HARD WAY:

This is the option that you’ll need to use if you want to age an existing mirror. It is messy and dangerous. As in, SERIOUSLY-SERIOUSLY hazardous without proper precautions. Really. Not. Remotely. Kidding.

Guess which option this post is about?
In the words of Tina Turner, “We don’t never do nothing niiiiice and easssssy…” (Actually…we do. Nice and easy would be preferable. In fact, it is actually the path of choice for us most of the time, but we just couldn’t resist the rare opportunity to use a Tina Turner quote. We also have decided to use the royal “we” for this paragraph. We will stop now.)
--------------------------------------

SUPPLIES:
-Glass mirror (with frame and/or board backing removed and set aside to be reattached later)
-Paint stripper (I used the spray kind, but there are also paste options)
-Muriatic acid (Even with a large mirror, you do not need much, so buy the smallest bottle possible)
-Plastic paint scraper
-Distilled water
-Several cotton rags, a few dampened with distilled water
-a roll of paper towels
-Sturdy drop cloth
-Two spray bottles, one for distilled water and one for muriatic acid (The one that you will use for the muriatic acid will not be reusable). Also, test the bottle for muriatic acid with water first to determine spray pattern. Spritzing on scrap brown paper like a cardboard box or grocery bag is a good way to see the spray pattern. Does it spray a mist or droplets? Is this the spatter pattern you want to make on the mirror? If not, find another bottle/nozzle that does create the look that you’re seeking.
-Sufficient newspapers to cover the dropcloth at least 5 layers thick for each chemical application
-Acid resistant gloves (I doubled up and wore another pair of gloves underneath)
-Protective goggles
-Respiratory mask for use with acids (dust masks are not effective against chemical mist/fumes)
-Clothing that will shield against splatters
-Hairband to secure long hair
-Optional but highly recommended: Another individual within earshot who knows what chemicals you are working with and has the number for poison control
---------------------------------
Before you begin:
  1. This project MUST-MUST-MUST be done in a VERY well-ventilated area…ideally outdoors. This is NOT a kitchen table project. Personally, I wouldn’t even do it in a basement or a garage unless the garage door was wide open. Make sure that all work surfaces are well protected. Keep kids and pets or even prone-to-do-stupid-things adults away from your work area until all chemicals are cleared.
  2. Take a quick moment to Google “muriatic acid” including what it can do to human flesh and particularly what it can do if inhaled. Now take another look at what you are using to protect yourself and objects from contact when using this chemical. Re-assess whether your precautions are sufficient in light of the really horrifying descriptions/pictures your web search yielded. Also know what to do in case of emergency. Muriatic/hydrochloric acid is not to be trifled with.
  3. Know what you plan to do with the rags, paper, excess acid, etc. when you’re done with it. What are the hazardous materials disposal processes in your community?
---------------------------
After protecting yourself and your work surface, lay the mirror face-down on the layers of newspapers. Spray or apply your paint stripper with a brush, following product directions. Depending on the stripper, paint should start to lift in 5 to 15 minutes. You’ll notice wrinkling and puckering of the paint, which indicates that it is lifting. Gently wipe the stripped paint away to reveal the silvering underneath. For difficult to remove paint areas, you can use the plastic paint scraper, being careful not to scrape the silvering off. Often it is better to just apply a bit more paint stripper to these areas and patiently wait for the paint to lift, rather than scraping harder and risking scratch lines on the silvering.
Once all of the protective paint has been removed, use your bottle of water to spritz the back of the mirror and wipe all paint stripper residue off with the paper towels. Ensure that no paint/paint stripper has seeped around the edges of the mirror and onto the front. If it has, clean those areas before the gunk has dried. This is also a good time to replace the soiled newspapers with clean and dry ones, in preparation for the next step. Allow the newly de-nuded mirror to dry.
Very carefully pour a small amount of the muriatic acid into the spray bottle that you have designated for this purpose, making certain not to be in the path of any fumes that may rise from pouring. When I opened my acid bottle, there was a foil seal at the opening. Rather than completely removing the seal, I poked two holes across from one another (like a colon- : ) . This allowed ventilation, so that when I poured from the “bottom” hole, the acid didn’t glug or slosh. Pour slowly and steadily to eliminate the possibility for spills.
Use the spray bottle to apply the acid to the areas that you would like to age. Any of the silvering that the acid touches will be lifted, so apply sparingly at first. Remember, you can always remove more (but not add) to the silvering. Let the acid sit for a minute or two, then using the dampened cotton rags, blot the liquid beads. Just blot. Don’t move the rag in circles, lines, or drag the rag in any way. This will smear the acid and muddle the spray pattern. Once all of the acid has been completely soaked up into the rag, allow the glass to air dry. After the glass is dry, use the water bottle to spritz the areas where the acid had been sprayed, allow the water to sit for a minute or two, then blot again (with unused rag) to remove acid residue and allow to air dry. (If there are water spots on the silvered side of the mirror after the second blotting, rinse mirror with a stream of water and gently wipe dry). Properly store/dispose of remaining acid and materials (newspapers, rags, gloves, etc) that it came in contact with, per your local hazardous materials requirements.
Once the mirror is dry and free of acid, you’ll need to apply to the back of mirror whatever you plan to have show through the gaps in the silvering that you have created. The traditional choice would be black paint to mimic a naturally aged mirror. Another option might be a contrasting metallic paint or leaf, such as copper or gold. Protect the paint and exposed silvering with cardboard or veneer cut to fit and reattach frame.


For the piece above, I used a small 5" mirror from the dollar store. These work well, and at their inexpensive price, they're good for experimentation before moving on to bigger mirrors.

After aging the mirror tile, I backed it with black paper and adhered it to a circle of pine using Liquid Nails. The black paper peeps through in the areas where the acid removed the silvering. I painted the wood mounting for the mirror black and added a simple sawtooth hanger on the back. Using epoxy, I added a ring of erratically shaped blued steel tacks to the rim of the wood to make this little accent mirror a bit more eerie and forlorn.


Since I knew that wasn't going to go through this aging process frequently,  I treated several mirror tiles at once to have a supply stash to work from. I'm certain that they'll be popping up in more elaborate works to come.

Friday, August 16, 2013

On the road and talking (temporary) shop

One of the big challenges for any artisan/crafter who sells their work in a live marketplace is how to display their work. What's going to draw a shopper's eye to your booth? What sort of impression are you making to keep a shopper's attention? What's going to protect your work from damage, especially at outdoor events? What's going to be easy to set up/take down? Most importantly, how are you going to fit 3 folding tables, your work, and any fixtures into a 2007 Toyota Corolla and still have room for your significant other?

While there are tons of ready-made fixtures designed for crafting display purposes, I went in a slightly different direction when I started showing my work at events a few years ago. While partially for practical reasons (read: I didn't want to sink a chunk of change into buying fixtures just in case this  whole-selling-my-stuff-face-to-face was a raging flop), I also felt that using repurposed objects to display my jewelry was a better fit for my overall flavor.

 Mid-setup at my favorite market Holy Hill Art Farm Market, October 2012

The vast majority of my fixtures have been scrounged from tag sales or made by me from found objects. Among these are:
  • Thrift store wall frames with the art/glass removed and replaced with fabric covered foam board. These make excellent pinboards for jewelry.
  • Smaller thrifted frames with pricing and credit card information.
  • Plant stands used to create multiple display levels within a small footprint.
  • Wooden wire spools used to create necklace rounders with the addition of tack "pegs" at the top and salvaged lazy susan bottoms.
  • Wine crates upended, with slide-in panels added to create shelves for small items.
  • Thrift store cut glass bowls to hold little bobs.
  • Wire photo displays (great for carded items or business cards)
  • Printer's trays 
  • Small wooden drawers
  • Old bakeware (cookie sheets, tart pans, etc)
  • Vintage servingware, including a revolving brass and glass relish tray and tiered dessert tray.
  • Thrifted linens and fabric remnants as table covers.
  • "Shelves" created with boards (scrap lumber found at my local ReStore) and decopaged buckets.
  • A vanity mirror with a drawer. Found for $2.99 at Goodwill, I painted and weathered the finish, then lined the drawer with copies of beauty product ads from the 1910-20's before filling it with carded handmade hairpins.
Since so many of my items are small and not able to be seen from across a room, I rely on creating an overall environment to attract attention and bring shoppers to my booth. Once there, I have various sections for folks to explore which holds their interest. Not shown in the photo is the vintage wooden doll cradle filled with seasonally-appropriate items (Life-size Dia De Los Muertos skulls and more tissue flowers like those shown on the table) that I placed at the entrance to my booth. While not my primary medium, the skulls and flowers did fit with my esthetic and got passers-by to pause long enough to pique their interest in my jewelry.

Midwinter Gathering fundraiser at the Kemper Center, January 2013

You'll also notice in this much smaller booth at another event that I have a few fixtures that are a bit more mass-market and intended for this purpose. Sometimes reinventing the wheel isn't mandatory, but paying a lot for traditional displays isn't either. Second hand fixtures are just as good as the brand spanking new displays that are on the market, often for a fraction of the price. The velveteen necks are a salvage from a mall jewelry store that went out of business (I bought an assortment of sizes for $.50 to $2.00 each). As for the black racks at the rear, those were found at a surplus shop for a dollar each and repainted.

----------------------------------------------

Looking to make the leap to vending at a craft show or thinking about adding to your existing display? Here are some ideas for doing it on the cheap:
  • Look up: Odds are that you'll have limited horizontal booth space, so you'll want to create some of you own with tiered displays (think shelving) or a mechanism to hang work at various levels (stanchions with wire drawn between them allow you to hang carded items or prints from clips). Risers for shelving can be created with a multitude of objects like books or bricks. Also consider hollow items like boxes or canisters that can be used to transport and store your stock.
  • Check out your local thrifts and rummage sales for objects that will compliment your work. Do you make awesome fabric accessories? Garage sale suitcases (relined and freshened up as appropriate) would make great bins. Mug trees and cup racks make great multi-peg displays
  • Consider building your own fixtures. As previously mentioned, the ReStore is a great source for all sorts of building materials. My local stores often seem to have a plethora of cabinet doors and hardware. Hinge a few together to form a folding "screen" and use knobs and hooks to create rack space.
  • Is mismatched and hodge-podge not your thing? Not to worry. A simple coat of the same color paint on all paintable surfaces and a remnant of fabric to cover soft surfaces can create a unified feel to your display space. Also, don't despair if a fixture isn't the right color/pattern. Inexpensive paint and Modge Podge can do wonders.
  • As regular readers know, I'm a clearance rack scrounger. I'm always looking at the deeply discounted out-of-season and scratch-and-dent treasures. Just because something was DESIGNED to hold Christmas cards or Easter eggs, doesn't limit it to that purpose alone. If you pried off the Santa head or painted over the dancing bunnies, would it work for your needs? Same thing for baby items. There are so many cool storage options for kid-related flotsam. A savings of 75-90% off can justify a bit of DIY modding. 
  • Don't rule out fixtures-designed-to-be-fixtures either. Craigslist and Ebay are great resources for finding secondhand retail fixtures and storage. Rolling racks, mannequins, and wire grid are all expensive items that depreciate rapidly and are easily found via salvage.


Saturday, April 6, 2013

Hula Hoop Rug (with suggestions and improvements)

Now that Spring is here, I've been considering snagging a tool for a tutorial that I'd pinned several months ago. That's right...it's HULA HOOP SEASON! The hoops that I've seen at the dollar store are far too flimsy to hold up for my purpose, but I've spotted a few at other discount, craft, and hardware stores that seem to be sturdy enough to withstand use in this project. I think I may snag a $5 one at Michael's this weekend.

This tutorial on Spoonful.com by


Goodwill Outlet Store in Appleton, Wisconsin that offer textiles and other materials at a flat rate per pound.

-Freecycle "want" posts: Since old clothing  IS something that will often end up in a landfill, it's something perfectly rational to ask for. Be forwarned though, practice good judgement when meeting other Freecyclers to pick up items. Most Freecyclers will leave their items out on their front porch/in their mailbox/by their front door for pick up. Entering a stranger's home is unwise.

-Group sourcing: While this is obvious, I'm going to mention it anyway. Let your co-workers/family/friends/etc know that you're collecting old shirts. If someone gives you a ton of discarded shirts, a nice "thank you" might be a rug of their own.

Tuesday, April 2, 2013

Waiting for the flowers


Until actual flowers start blooming around here in Wisconsin, we'll have to settle for faux ones. These are some of the ones that I had made last October for El Dia de los Muertos. Want to make your own? Try this super easy tutorial:


Friday, March 29, 2013

DIY Plastic Figure Bowl Tutorial


In addition to being cool geek art, I thought this melded plastic figure bowl would make a great alternative to the traditional Easter basket for those kids or "big kids" that aren't the pastel basket or bucket sort.

Unfortunately, the site where I found the photo that inspired this project didn't actually explain how this piece was made. Rather, they offered a link to a project describing a slightly different result (3D interior, flattened exterior).


While this is fine if this is the look that you're going for, the tutorial also advises using your oven to melt the figures. This likely is NOT so fine as various commenters have suggested, since even with a fairly well ventilated kitchen, you'll be releasing some pretty noxious chemicals into your house.

While there's a link in the original post that suggests a safer/more even alternative, it doesn't actually lead to that explanation. I figured it out, though...and my solution also solves the fully-3D-on-the-outside-any-flattened-surfaces-on-the-inside question.


Supplies:
-Pyrex bowl (use heat resistant glass for safety)
-Various plastic figures (I found mine at Dollar Tree, 48 in a package)
-Heat proof surface (ext: wire grate elevated a few inches above a cement walkway or even bricks placed together to form a pad. There should be some ventilation from beneath the bowl and the holes in the grate/spaces between the bricks will allow bits of the figures to extend beyond the edges of the glass bowl )
-Heat tool (the sort used for scrapbook embossing and shrink film that goes to about 400 degrees...not a heat gun for stripping paint)
-BBQ tongs
-Safety glasses and dust mask (for precaution)
-Outdoor space (Don't do this indoors)


Process:

Place Pyrex bowl upside down on the heatproof surface. Take two figures and lean them against the bowl overlapping one another a bit. At the lowest setting (to start, increase heat if needed), use your heat tool to melt where they touch to form a joint(s). Take a third figure and fit it against the melded figures to see where it would join. Remove that figure and heat that point, then use that still-molten point to stick back in place to meld with the first two figures.  Work your way around the whole Pyrex bowl that way.

As you go, you'll want to make sure that the figures are melding securely, Holding the heat tool in one hand, use the BBQ tongs to smoosh the figures together to meld, Cool bowl and figures completely, then gently detatch the melded plastic from the glass where it may have adhered. If a join breaks when the bowl is being removed, use your heat tool to re-melt the joint.


You'll notice in this shot that there is a bit of flattening on the inner wall, but the exterior is still very 3D.


As you can tell, the melted plastic is quite rigid. The more contact points that you meld, the sturdier it will be.


Ta-DAH! Completed bowl, top view

 Additional Notes:

-Don't limit yourself to Army men. There are a TON of different options of bagged plastic figures at the dollar store and where party favors are sold. How about dinosaurs? Bugs? Farm animals? Cars or other vehicles? Close to Halloween, you might even find glow in the dark versions!

-Can't find the color you want? Finished bowls can always be spray painted. You can even add a sprinkle (or coating!) of glitter. Use a spray sealant to protect any color or sparkle from flaking or chipping.

-Because of the cheapy non-food grade nature of the plastic and the fact that it was further melted, I'd be a bit leery of putting unwrapped food in direct contact with the toy bowl. (I know...the toys are supposed to be tested as child safe, but speaking as someone who worked with procuring inexpensive import toys for a few years, LOTS of bad stuff slips through). A liner of some sort or just regular wrapping on the food (ie: the candy's packaging if using as a treat bowl) should be fine. Also, thoroughly wash the Pyrex bowl (and tongs) after using it as a mold to remove all residue.

-For a less porous bowl, use the same technique from the first layer to add additional layers of figures, melding the consequent layers onto one another.

-I know this goes without saying, but THIS IS NOT A SAFE-FOR-KIDS-TO-DO PROJECT! Despite this bowl being made out of toys, melting plastic and a heat tool will burn little fingers. If you can manage using a glue gun, you should be able to handle this project unscathed, but accidental burns are always a risk.


Wednesday, March 27, 2013

Free The Amigurumi!

 From A{mi}Dorible Crochet.com
As previously stated, I am not a fiber artist...but that doesn't mean I'm not amazed by all of the nifty stuff that my fiber peeps create. The other day, I ran into the motherlode of freebie amigurumi projects. The Great Amigurumi boasts 1500 (yes...FIFTEEN HUNDRED!) free amigurumi patterns. Some favorites of mine:


Daryl Dixon (Walking Dead) from Nicrochet


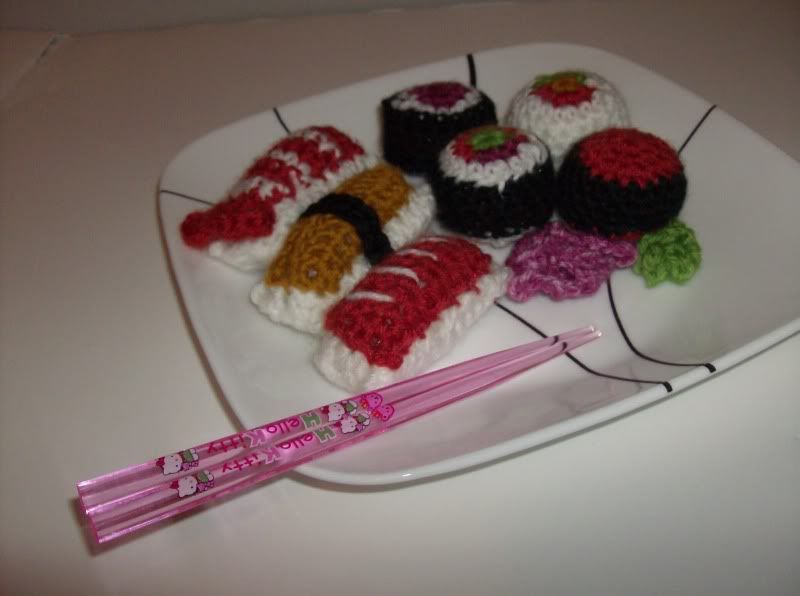
Sushi from StitchLove

Nibbler (Futurama) from Hooks and Needles


Sunday, March 24, 2013

Train-of-thought tutorials using repurposed Easter items


Sometimes things just fall together in interesting patterns.

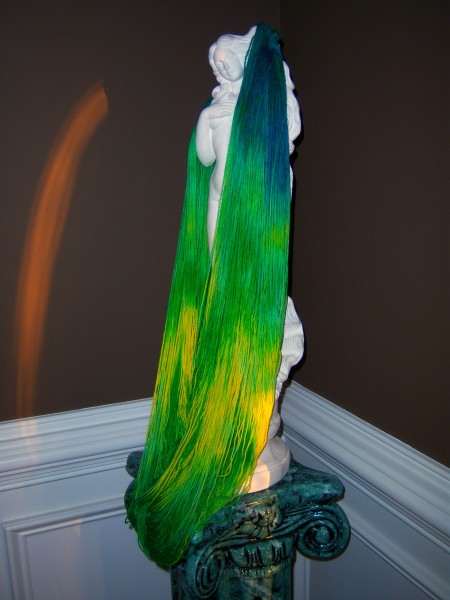
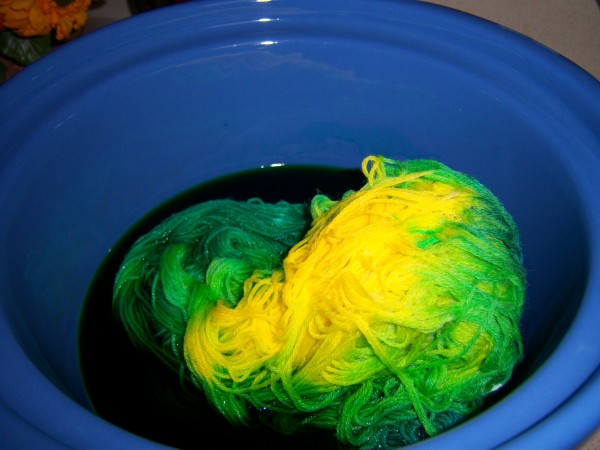
Case in point: Earlier today I was poking through some tutorials and came upon a really nifty project on Suzy's Artsy-Craftsy Sitcom for using Easter egg dye and a crockpot to hand color wool yarn.

Worth noting since spring is (theoretically) here, the thrifts should be clearing out all of their (ravel-able) wool sweaters and already-cheap Easter egg dye is going to be 75%-90% off in another week and a half. Might be an idea for cheap repurposing project experimentation for those so inclined.


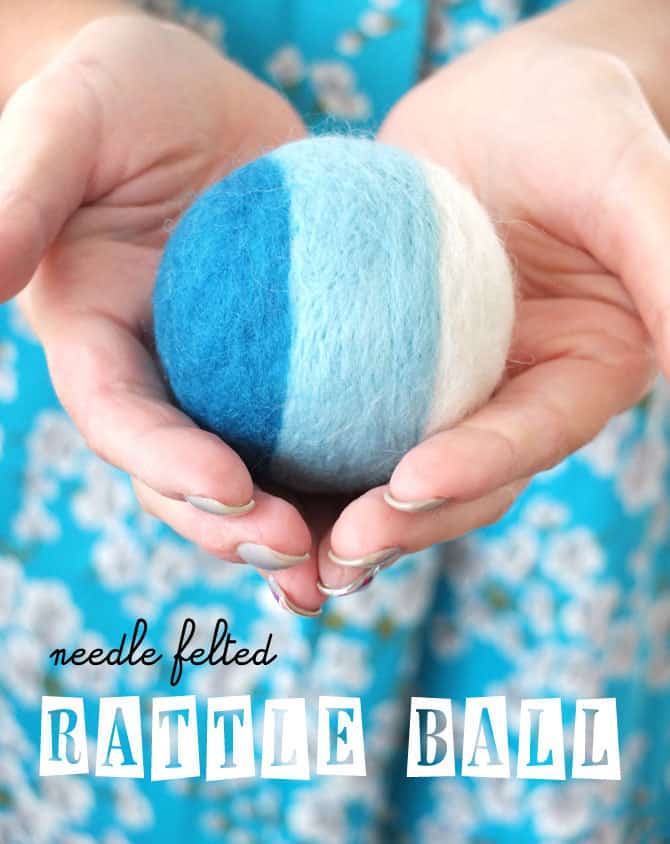
...And later ran into fiber art project at Prudent Baby involving ANOTHER repurposed Easter clearance item: one of those plastic fill-able eggs to contain the bell in the center of the rattle. A good idea to make your amigurumi jingly too.
 Now to confess, I don't actually do the fiber art thing. I have tons of friends who do, so I do notice nifty yarn-y stuff when I run into it. 

For those of us who'd like to make a soft rattle but don't knit/crochet, yet have basic sewing skillz, I also saw this project on Handmade by Jill using ready-made cotton socks. This would make a terrific handmade baby shower gift.

See? Funny how things run together! 


Sunday, January 15, 2012

A couple of quick and inexpensive salvaged fixture rehabs

As I've previously mentioned, I'm vending at Midwinter Gaming Convention next weekend. In preparation for this, I'm doing an assessment of the booth fixtures I have and figuring out how to display everything.

I'm always looking for objects that I can repurpose, not only for my shinies, but also for use in displays. While I do have a few of the standard black velvet-covered-intended-for-jewelry-display geegaws, most of my fixtures are found items. (Technically, a few of the velvet bits are salvage too, since I bought them at a mall jewelry store's going out of business sale.)

A while back, I found this clippy stand that I believe was originally intended for pictures. It's a bit over 2 1/2 feet tall (depending on how the wire tentacles are arranged) and I snagged it from my local Goodwill for $2.99.
While the chrome finish wasn't bad, I wanted it to look a bit more steamish/vintage laboratory. I painted the base and wire arm socket a matte black and wrapped the upward shaft in a coil of 18 gauge copper wire (Since I knew this was going to take a lot of wire, I used the inexpensive $2.99 for 25 feet wire from Menards. I'm glad I did, since it used precisely the whole package.). I think I might also add either an etched brass plate on the base or use a metal label frame to give it even more faux science flair. It'll make a great holder for some of my X-ray image necklaces.
Remember a few weeks ago when I wrote about hitting the after-Holiday clearance sales for recyclable items? These enameled metal cans were among this year's spoils. They're about 12 inches tall and were $2 each after an 80% markdown.
I'd bought them to serve as stanchions/pillars to elevate part of one of my displays closer to eye-level. While the "before" picture shows them upside down, they're very sturdy right side up too, so I decided to decorate them that way. I still had quite a few of the medical quackery ads left over from my torso project, so I decopaged the cans with the paper scraps, then added a layer of sealant.
They're also a great size for packing smaller items into/creating protected sections in my big tote boxes when transporting everything to and from events.

Saturday, December 24, 2011

The Great Repurposing of December 26th

I am a clearance rack scrounger, an archaeologist of the scratch-and-dent aisle, always looking for a way to reuse some 80% off castoff into something nifty. Natually...I love after-Christmas decoration sales.

The other day, I happened upon a blog post detailing an awesome tutorial for using shatterproof tree balls to make Victorian hot air balloon decorations.


Clever idea and, considering come Monday, the main component of this project will be on deep discount, it's a really inexpensive one too! I can just imagine one of these dangling in a bell jar (or in one of those 1990s glass candle holders turned upside down. These seem to pop up with some regularity at my local thrifts) as a steampunk decoration on a shelf.

Martha over at Ornamento also posted some ideas for combining glass balls with polymer clay, fibers, and other items to create not-necessarily-Holiday ornaments.


Goodbye snowman! Hello posh frippery!

Skitzo Leezra Studio posted a few years ago about transforming a estate sale find tree skirt into a circle skirt for a child (which looks like it would be easily transferrable for a shorter skirt for an adult)


Jumping completely away from the Christmas look is this white flower lantern tutorial from CraftyNest. What a clever re-use of a fake pointsetta garland!


This started me thinking about what sort of repurposeable bits I look for when hitting the post-Holiday clearance section.

-Ribbon: Admittedly, the Christmas red plastic-backed "velvet" outdoor stuff is of limited use, but better made ribbon is a good find. I usually look for dark jewel tones or ivory, but non-Christmas-y shades of Holiday colors like deep burgundy or olive/forest tones work.

-White Lace: Whether paper, fabric, or tatted-looking, I consider whether I can cut it apart for usable portions and whether it will take a tea/coffee bath for a more antiqued shade.

-Decorations That Can Be Deconstructed: Can beads or glass cabochons be removed to use in other projects? If the starburst was clipped off with wire cutters and repainted, would it look midcentury modern?

-Broken Things: Is there anything usable/salvageable about the item if you look beyond it's original purpose? The porcelain angel may have a cracked head, but could the repaired head/limbs be used in an assemblage piece? The embroidered table runner may be stained, but does the remaining undamaged fabric justify the $5 price tag?

-Metal trays: Repainted or decoupaged with a hanger mounted on the back, these make great magnetic memo boards. Paint the inside surface of a deeper tray with chalkboard paint for a writeable board (the wall of the tray makes a good chalk rest).

-Holiday Paper Products: Sometimes just the 20 high quality envelopes are well worth the 90% off price of Christmas cards in January. Also, I look at wrapping paper and paper napkins as potential papercraft materials (For example, Hobby Lobby had some nifty black on black swirly design paper this year). While bright gold foiled paper might look pretty Holiday-specific, it would look less so if sponged with brown alcohol ink to mottle it (Same for silver foil and grey ink). Tissue paper is also high on my snag-able list for countless reasons.

-Random Tchotchkes: Often I look at the basic shape of things and figure out whether a good coat of paint (or sometimes stripping of paint) could un-Holiday them. If I unscrewed the hooks from the bottom of those cast iron fleur-de-lis stocking hangers and painted them black, I could have bookends! Stars and birds are frequently-used holiday decoration shapes and de-hollyfied, can be used year-round.

My best finds from last year were a few very nice Baroque-looking glass and silverplate cross ornaments that were marked down to 1/10th their original price. I combined these with my holy water and wolfsbane potion charms and "silver bullet" charms on a long silver-finish chain to make vampire and werewolf protection talismans for a local LARP convention.

How have you recycled something "Holiday" into art supplies? Please share!

Tip 
Junkie handmade projects