

Showing posts with label shiny bits. Show all posts
Showing posts with label shiny bits. Show all posts
Monday, June 9, 2014
Slay-A-Thon
Sending this pendant off to the Slay-A-Thon Benefit
happening on June 21st (figured I'd stay in the Whedonverse with my
donation). Tumbled and drilled glass with hand aged paper (well sealed
with acrylic) on a 20" triple strand of recycled silk with a toggle
clasp. Like it? Want it? Come on out to Dave and Buster's In Chicago on
June 21st to benefit the Illinois Make-A-Wish Foundation.

Tuesday, April 8, 2014
Finding Home
I created this piece (“Finding Home”) for the annual Milwaukee Habitat For Humanity/ReStore Recycled Art contest. This year’s theme was “COMMUNITY” and required artists to utilize primarily reclaimed/recycled materials found at the ReStore in their work. The piece features hand-wrought links from scrap steel wire, a chandelier crystal, various hardware components, ephemera (map, snapshot of a family gathering, etc) and other recycled materials, displayed in a salvaged maple drawer repurposed as a shadow box.

As a side
note, this piece is also available for purchase via Milwaukee Habitat For
Humanity/ReStore and inquiries may be made at the above website. I have it
priced at $60 and will be donating the full amount of the sale to Habitat For
Humanity.
Saturday, April 5, 2014
Bony Rabbit
My take on the RAM's 5th Annual International PEEPs Exhibition . Acrylic on 11x14 canvas, with vintage wood frame. Phosphorescent paint was used on the bones to emit a soft glow in low light and glass bead suspension medium was used as a glaze to mimic a sugar crust, as well as pearlescent medium.

I don't usually do painted canvases, but I decided to step out of my
comfort zone since my original idea was vexing me (next. year.). I tried
to keep the calaca cute, befitting a marshmallow, but this is probably going to be the darkest entry of the challenge. This is what
happens when a diabetic with spooky tastes starts thinking about Easter
candy...
Thursday, April 3, 2014
Acorn pendant

I didn't have time to make anything new and exciting for my mom's birthday this weekend, so I sent her one of the oak pendants that I'd made for the shows at the farm last fall.
(I'm SUPER behind on posting new items to my Etsy shop. I did these 6+ months ago and still I haven't managed to take the time to write copy and take photos.)
Tuesday, April 1, 2014
The Avatrix
I was reviewing some shots of older (and long since sold) pieces in preparation for a juried application and came across The Avatrix

This was done for a steampunk event in 2009 or so. Cast bronze finish focal, with beveled-corner Czech glass cube beads, bronze spacers, glass and freshwater pearls, and a repurposed cloak clasp. I *know" I have another focal like this somewhere in my supply stash and this inspires me to go looking for it.
This was done for a steampunk event in 2009 or so. Cast bronze finish focal, with beveled-corner Czech glass cube beads, bronze spacers, glass and freshwater pearls, and a repurposed cloak clasp. I *know" I have another focal like this somewhere in my supply stash and this inspires me to go looking for it.
Monday, March 24, 2014
Playing with steel wire
It's been a long winter and while I wish I could say that I've spent the last few months making 8 billion new pieces to show everyone, I'm just not at the "show-off" point. I've done quite a bit...but I just need to get things photographed and posted onto Etsy soon.
In the meantime, I'll show you a work in progress. I'm currently working on a piece for a challenge that requires me to use only reclaimed/recycled materials. Here's a portion of the project, about 17 inches of handmade chain of 16 gauge steel with twisted double strands of 20 gauge steel for jump rings. Annealed...but my hands still ache. I also took steel wool to each link to bring up a bit of shine and applied Renaissance Wax to deter rusting.

Photos of the finished piece to follow (my deadline is 4/1 for the challenge), as well as other endeavors!
In the meantime, I'll show you a work in progress. I'm currently working on a piece for a challenge that requires me to use only reclaimed/recycled materials. Here's a portion of the project, about 17 inches of handmade chain of 16 gauge steel with twisted double strands of 20 gauge steel for jump rings. Annealed...but my hands still ache. I also took steel wool to each link to bring up a bit of shine and applied Renaissance Wax to deter rusting.
Photos of the finished piece to follow (my deadline is 4/1 for the challenge), as well as other endeavors!
Saturday, December 7, 2013
DIY Party Girl
Since we're getting in the thick of the swank shindig season, I thought I'd share some of the tutorials that I've found lately for some posh (but super inexpensive) sartorial stylings:
 I love this super-easy and inexpensive tulle skirt project from Cotton and Curls. Ever want to sport a poofy skirt like Carrie from the opening of Sex in The City? Now you can!
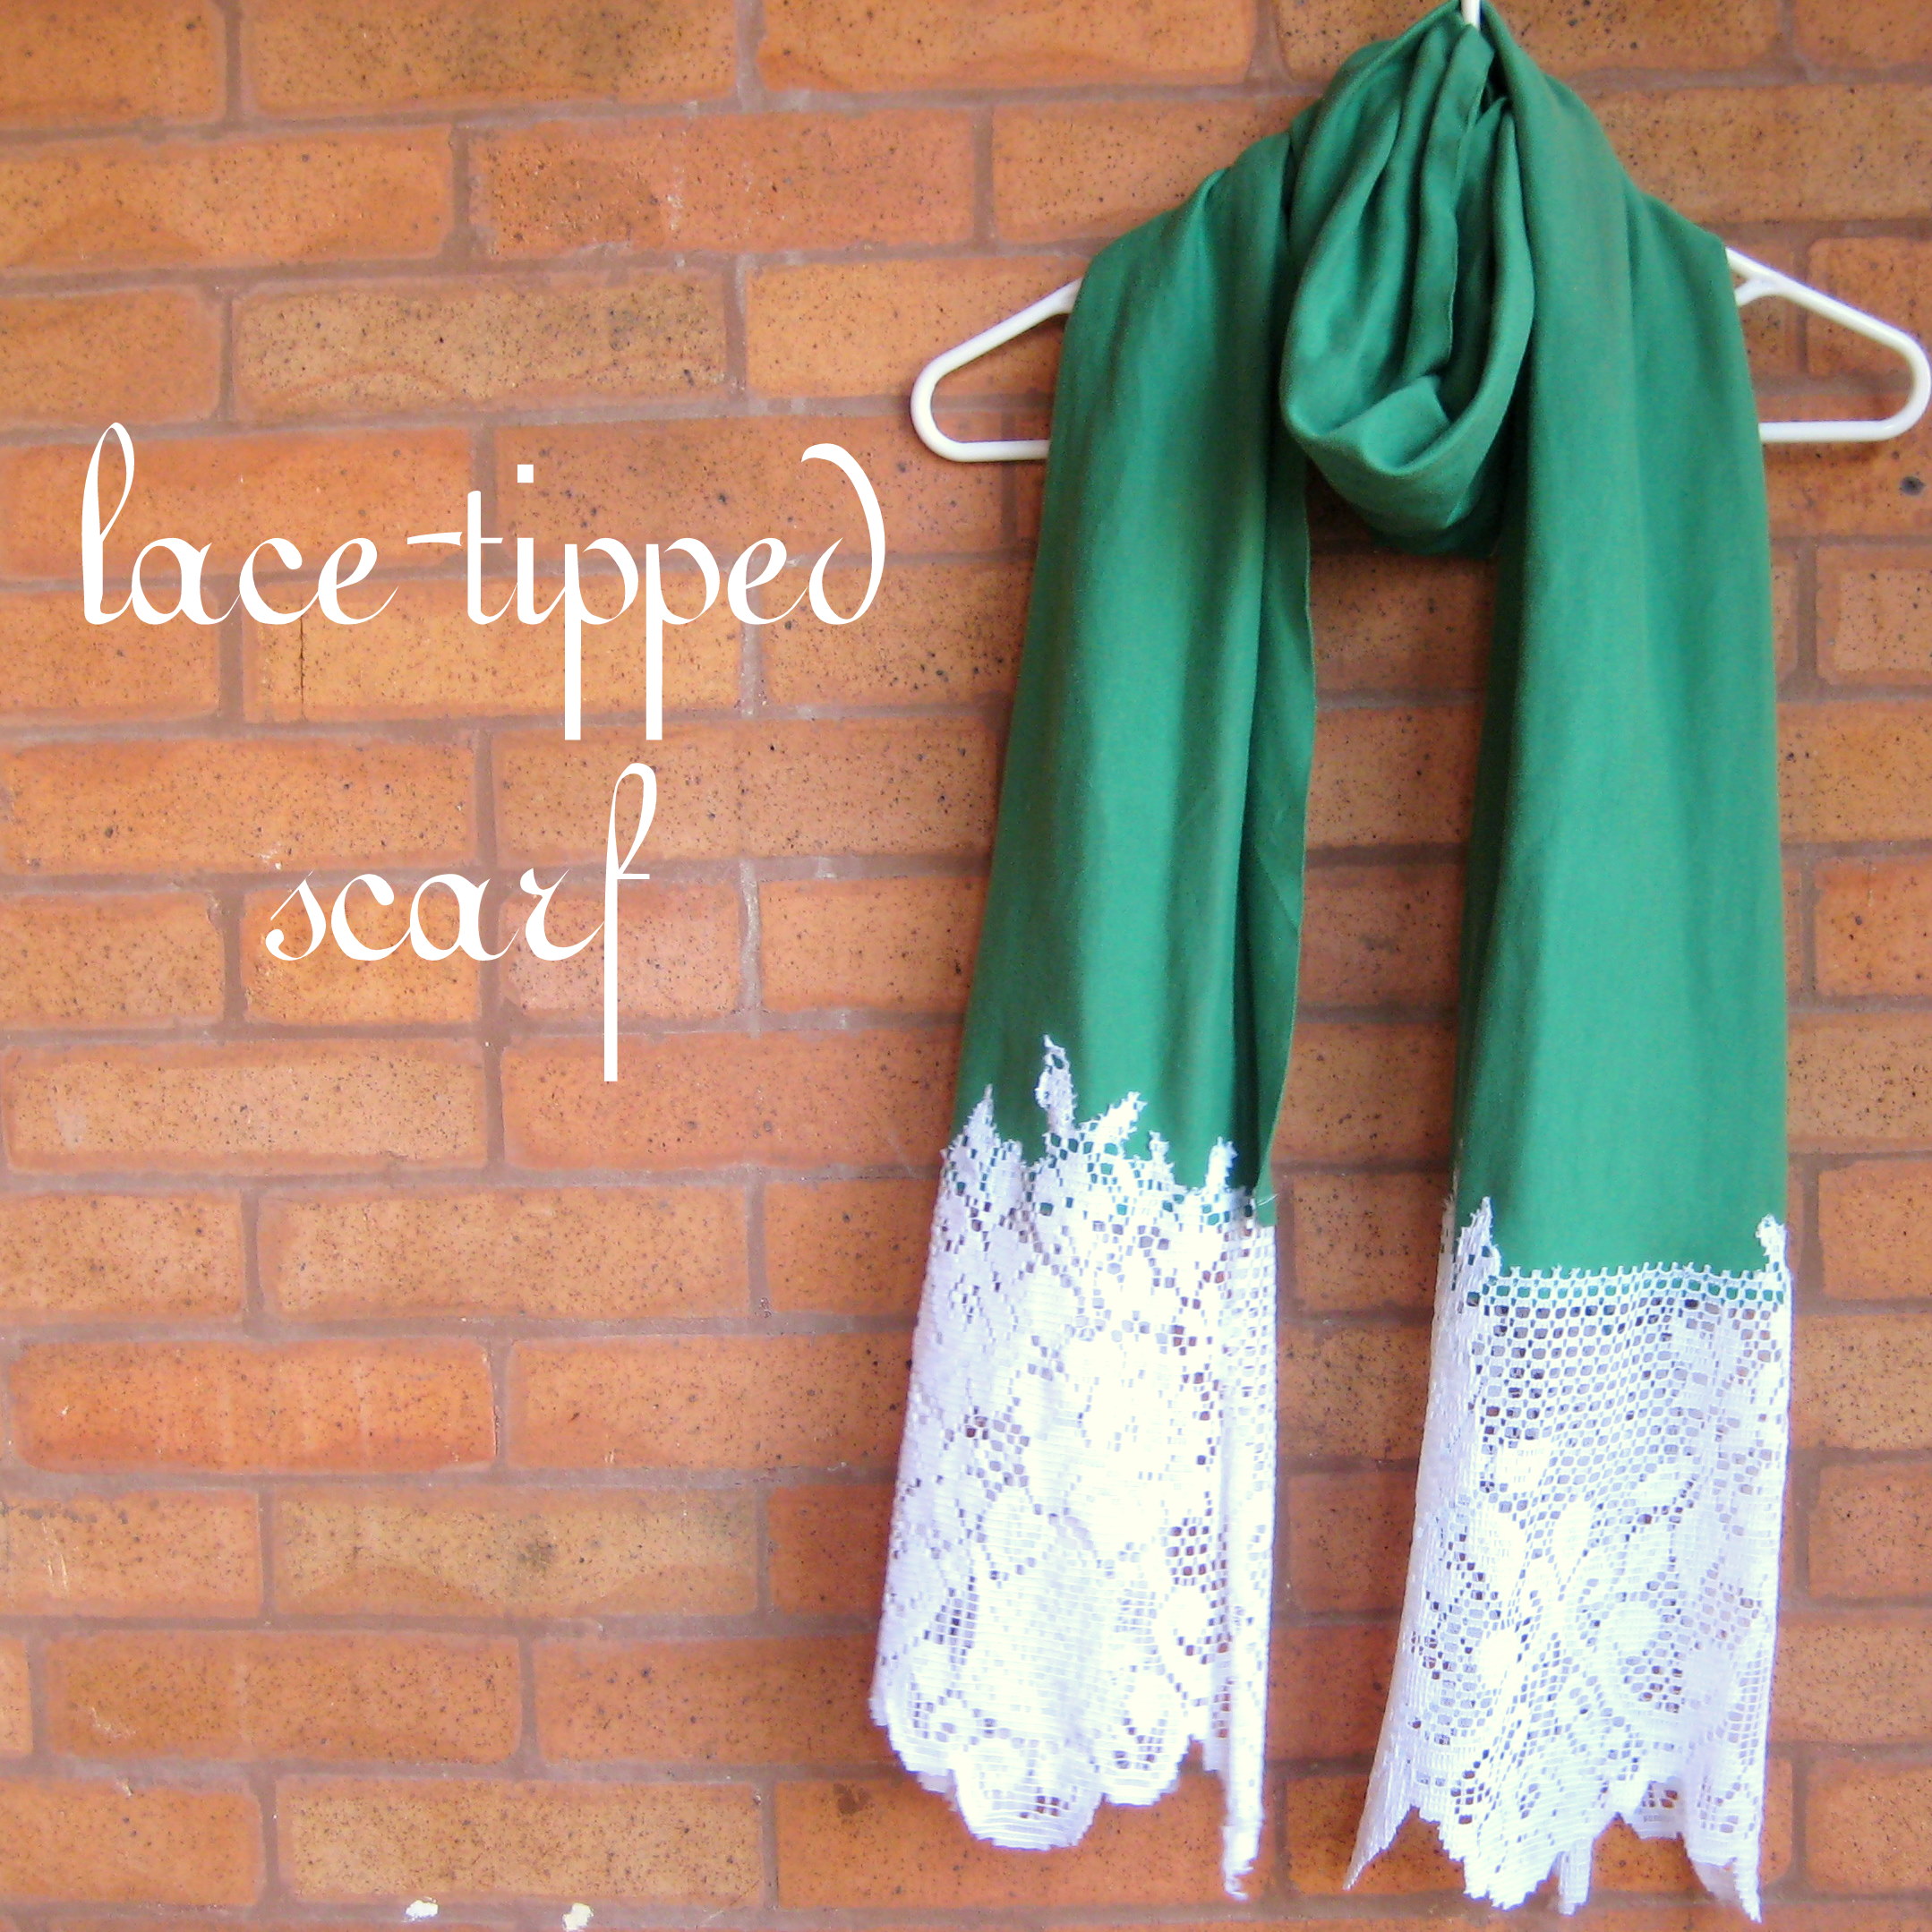 Another terrific bargain project is this scarf from Sea Lo Que Sea's blog, taking inspiration from an $1100 piece.
 Lindsay over at Impatiently Crafty gives a great tutorial for glitter shoes. The best part? She also gives some great examples of what NOT to do.
 If your (or your partner's) style is a bit more on the butch end of the spectrum, there's always this necktie project from The Purl Bee. Not only could you do this in ANY woven fabric pattern or solid, you could also customize your fabric with a DIY screen print using Mod Podge with this tutorial from Better Homes and Gardens.

Tuesday, December 3, 2013
The Art of AdORNAMENTS at the RAM, December 6-29th 2013
I had nearly forgotten about Racine Art Museum's call for artists for their The Art of AdORNAMENTS exhibition this month until last night...at 6 p.m...the night before submissions were due. Still wanting to participate, even if I couldn't whip up something stellar on short notice, I did manage to get an ornament together and deliver it to the museum on my lunch hour.

All components are from my scrap stash. The butterfly wings are plastic that I painted with iron paint (love that stuff!) and rusted with my salt and vinegar mix. The rhinestones are a vintage buckle and a brass skeleton key is attached with a coil of salvaged copper wire. Vintage glass beads and pearls are attached with more repurposed wire bits. Not an epic and ornate work by any means, but I rather like it.


All components are from my scrap stash. The butterfly wings are plastic that I painted with iron paint (love that stuff!) and rusted with my salt and vinegar mix. The rhinestones are a vintage buckle and a brass skeleton key is attached with a coil of salvaged copper wire. Vintage glass beads and pearls are attached with more repurposed wire bits. Not an epic and ornate work by any means, but I rather like it.
The exhibition opens at 6 p.m on Friday, December 6th during Racine's monthly First Friday festivities, which is always a fun evening. In addition to the AdORNAMENTS show opening, the museum is featuring a exhibition of blown glass ornaments from the Mathis Collection and a number of downtown galleries and studio spaces are open late for the First Friday event.
Thursday, November 28, 2013
Upcycled earring display
During the summer, I’d found a chrome laundry
hamper frame and decided to salvage it to use as a display piece at
shows. Since it was too new- looking to fit with the rest of my fixtures,
I gave it a couple of coats of iron paint followed by a wash of salted vinegar
to rust it. I hung it on a chain from one of the beams under the hayloft at the
Holy Hill Art Farm Market in October, and used clothespins to attach earring
cards to create sort of an “earring chandelier” for my booth. Using a swivel
clip at the end of the chain also allowed it to be turned by the customer to
show all sides.


(forgive
the grainy camera phone shot, this is my only photo of the piece in action in
this incarnation)
While it worked wonderfully as a hanging piece,
I knew I wouldn’t usually have a ceiling to hang it from at most shows and it
would take up a lot of space as a tabletop piece. I needed to figure out a way
of making it freestanding.

I found this coat rack at Goodwill for $4.99
and hit upon an idea. The rack comes apart in sections, each with an upright
screw post to attach it to the next. This would make it easy to break down for
transporting to and from shows.

I removed the top portion with the coat pegs
and added a scrap craft plaque (thrifted) that I'd stained to match the coat rack, screwed into the top post. Between
this plaque and another, I added a lazy susan mechanism (salvaged) which would
allow the display to rotate. The hamper then rests on top, with four upright
screws between the cross supports of the hamper. These upright screws fit into
holes in another plaque on top of the stack and are secured using easy-to-remove wing nuts.

This top plaque not only holds the hamper to the coat rack
base, but also allows it to be removed for events where I can use it in “chandelier”
form. The wing nuts also provide a socket to hold signage for the rack.

Here we have the new rounder "in action" at the Holiday Craftacular in Madison last weekend.

Unfortunately, I managed to crack one of the legs when a tote fell
against it in my car, so I had to McGuyver a packing tape solution
on-site. A bit of wood glue, a screw, and a clamp to hold it until the
glue sets and it'll be back in the game for the next event!
Thursday, September 12, 2013
Repurposed revolving necklace rack
A quickie project from yesterday:

About a month ago, I found this lamp as-is at a local thrift for $.90 ($1.80 on a half-off day). With hanging wires and an altogether Bordello Baroque look, its appeal was probably lost on most folks...but I snatched it up IMMEDIATELY. It's a hollow but heavy cast metal, so I knew it would make a sturdy base for *something*. I also picked up a battered tart plate for $.25 (again...$.50, with the half-off special).

Wiring removed, a swivel and screw pegs added from my hardware stash, the whole thing painted with some on-hand oil enamel...and I have a new revolving necklace rack for next weekend's show. With the wide flat top, I can also use this as a pedestal for a bowl of charms or signage.
Not bad for a $1.15 outlay!

About a month ago, I found this lamp as-is at a local thrift for $.90 ($1.80 on a half-off day). With hanging wires and an altogether Bordello Baroque look, its appeal was probably lost on most folks...but I snatched it up IMMEDIATELY. It's a hollow but heavy cast metal, so I knew it would make a sturdy base for *something*. I also picked up a battered tart plate for $.25 (again...$.50, with the half-off special).

Wiring removed, a swivel and screw pegs added from my hardware stash, the whole thing painted with some on-hand oil enamel...and I have a new revolving necklace rack for next weekend's show. With the wide flat top, I can also use this as a pedestal for a bowl of charms or signage.
Not bad for a $1.15 outlay!
Friday, August 16, 2013
On the road and talking (temporary) shop
One of the big challenges for any artisan/crafter who sells their work in a live marketplace is how to display their work. What's going to draw a shopper's eye to your booth? What sort of impression are you making to keep a shopper's attention? What's going to protect your work from damage, especially at outdoor events? What's going to be easy to set up/take down? Most importantly, how are you going to fit 3 folding tables, your work, and any fixtures into a 2007 Toyota Corolla and still have room for your significant other?
While there are tons of ready-made fixtures designed for crafting display purposes, I went in a slightly different direction when I started showing my work at events a few years ago. While partially for practical reasons (read: I didn't want to sink a chunk of change into buying fixtures just in case this whole-selling-my-stuff-face-to-face was a raging flop), I also felt that using repurposed objects to display my jewelry was a better fit for my overall flavor.

The vast majority of my fixtures have been scrounged from tag sales or made by me from found objects. Among these are:

You'll also notice in this much smaller booth at another event that I have a few fixtures that are a bit more mass-market and intended for this purpose. Sometimes reinventing the wheel isn't mandatory, but paying a lot for traditional displays isn't either. Second hand fixtures are just as good as the brand spanking new displays that are on the market, often for a fraction of the price. The velveteen necks are a salvage from a mall jewelry store that went out of business (I bought an assortment of sizes for $.50 to $2.00 each). As for the black racks at the rear, those were found at a surplus shop for a dollar each and repainted.
----------------------------------------------
Looking to make the leap to vending at a craft show or thinking about adding to your existing display? Here are some ideas for doing it on the cheap:
While there are tons of ready-made fixtures designed for crafting display purposes, I went in a slightly different direction when I started showing my work at events a few years ago. While partially for practical reasons (read: I didn't want to sink a chunk of change into buying fixtures just in case this whole-selling-my-stuff-face-to-face was a raging flop), I also felt that using repurposed objects to display my jewelry was a better fit for my overall flavor.

Mid-setup at my favorite market Holy Hill Art Farm Market, October 2012
The vast majority of my fixtures have been scrounged from tag sales or made by me from found objects. Among these are:
- Thrift store wall frames with the art/glass removed and replaced with fabric covered foam board. These make excellent pinboards for jewelry.
- Smaller thrifted frames with pricing and credit card information.
- Plant stands used to create multiple display levels within a small footprint.
- Wooden wire spools used to create necklace rounders with the addition of tack "pegs" at the top and salvaged lazy susan bottoms.
- Wine crates upended, with slide-in panels added to create shelves for small items.
- Thrift store cut glass bowls to hold little bobs.
- Wire photo displays (great for carded items or business cards)
- Printer's trays
- Small wooden drawers
- Old bakeware (cookie sheets, tart pans, etc)
- Vintage servingware, including a revolving brass and glass relish tray and tiered dessert tray.
- Thrifted linens and fabric remnants as table covers.
- "Shelves" created with boards (scrap lumber found at my local ReStore) and decopaged buckets.
- A vanity mirror with a drawer. Found for $2.99 at Goodwill, I painted and weathered the finish, then lined the drawer with copies of beauty product ads from the 1910-20's before filling it with carded handmade hairpins.

Midwinter Gathering fundraiser at the Kemper Center, January 2013
You'll also notice in this much smaller booth at another event that I have a few fixtures that are a bit more mass-market and intended for this purpose. Sometimes reinventing the wheel isn't mandatory, but paying a lot for traditional displays isn't either. Second hand fixtures are just as good as the brand spanking new displays that are on the market, often for a fraction of the price. The velveteen necks are a salvage from a mall jewelry store that went out of business (I bought an assortment of sizes for $.50 to $2.00 each). As for the black racks at the rear, those were found at a surplus shop for a dollar each and repainted.
----------------------------------------------
Looking to make the leap to vending at a craft show or thinking about adding to your existing display? Here are some ideas for doing it on the cheap:
- Look up: Odds are that you'll have limited horizontal booth space, so you'll want to create some of you own with tiered displays (think shelving) or a mechanism to hang work at various levels (stanchions with wire drawn between them allow you to hang carded items or prints from clips). Risers for shelving can be created with a multitude of objects like books or bricks. Also consider hollow items like boxes or canisters that can be used to transport and store your stock.
- Check out your local thrifts and rummage sales for objects that will compliment your work. Do you make awesome fabric accessories? Garage sale suitcases (relined and freshened up as appropriate) would make great bins. Mug trees and cup racks make great multi-peg displays
- Consider building your own fixtures. As previously mentioned, the ReStore is a great source for all sorts of building materials. My local stores often seem to have a plethora of cabinet doors and hardware. Hinge a few together to form a folding "screen" and use knobs and hooks to create rack space.
- Is mismatched and hodge-podge not your thing? Not to worry. A simple coat of the same color paint on all paintable surfaces and a remnant of fabric to cover soft surfaces can create a unified feel to your display space. Also, don't despair if a fixture isn't the right color/pattern. Inexpensive paint and Modge Podge can do wonders.
- As regular readers know, I'm a clearance rack scrounger. I'm always looking at the deeply discounted out-of-season and scratch-and-dent treasures. Just because something was DESIGNED to hold Christmas cards or Easter eggs, doesn't limit it to that purpose alone. If you pried off the Santa head or painted over the dancing bunnies, would it work for your needs? Same thing for baby items. There are so many cool storage options for kid-related flotsam. A savings of 75-90% off can justify a bit of DIY modding.
- Don't rule out fixtures-designed-to-be-fixtures either. Craigslist and Ebay are great resources for finding secondhand retail fixtures and storage. Rolling racks, mannequins, and wire grid are all expensive items that depreciate rapidly and are easily found via salvage.
Friday, August 2, 2013
Playing with patinas

(click for larger view)
A couple of weeks ago, I played with
patinating some charms that I had on hand. Not the best shot admittedly
(I'd just sealed them and they were drying), but I so rarely photograph
WIP and figured I'd share. I really like how they turned out and ended
up using some of them in earrings and necklaces.
Wednesday, April 3, 2013
Happy Birthday, Mom!

Sharing a quick shot of the pewter and Czech glass bracelet that I'd made last night. It'll be going off in the mail with my mom's birthday card this morning. I've been holding on to those leaves for a while and they seemed like the perfect beads for this simple piece.
Monday, March 25, 2013
Run, Rabbit Run (and Lovecraftian snacks)
In the interest of silly, I decided to enter the RAM's Fourth Annual International PEEPS® Competition this year. I'd attended the showing last year and it looked like fun. It seems to also be garnering a bit of truly international attention too (like this piece on the BBC's travel blog), so why not?


"Tom" Dave Watkins' adult division winner from 2012
"Peeps Porridge" by Patricia Roberson, winner of The Coveted 2012 PEEPles Choice Award
The decision to enter was also somewhat aided by the fact that I had discovered two packages of green bunny peeps from LAST YEAR in my pantry. I'd stashed them behind the wine bottles, so I wouldn't be tempted to eat them...then promptly forgot them. I'd intended to use them to make Cthulhu peeps, but they were quite stale by the time I found them. Perfect for some other odd repurposing, though.

Since a bit demented seems to work at this event, I'd initially thought about getting more Peeps that were soft enough to alter this way and do a carbohydrate tribute to The Old Ones. Instead, I decided to go in another geeky direction and play with a steamish sugar/calories=energy concept. Also: I wanted an excuse to use the title, "Run, Rabbit Run". Whenever one has the opportunity to make a Pink Floyd reference, I think that it is imperative that one should seize it.
Some of my original doodles for the project were a bit...dark, though. They just had too much of a Geiger-y or animal experimentation vibe, so I had to tone it down a bit. Since this was going to displayed in kid-friendly space, I figured there was a limit on the creepy mecha-mallow factor.
This was what I ended up with:

As a personal challenge, I tried to make this as inexpensively and use repurposed parts as much as possible.
Materials used:
-Recycled cookie
tin ($0.49 from Goodwill...faux rusted and painted)
-Ossified marshmallow Peep (Spray painted)
-Salvaged copier
gears (Snagged a while back from a surplus store...painted)
-Salvaged computer
fan (Snagged a while back from a surplus store...painted)
-Wire fencing mesh (Roll end scrap from a hardware store. I think I paid less than a buck for about 4 square feet)
-Brass eyelets (Deadstock from a shoe factory that I had found at a flea market. I paid a dollar for a pound+ corroded box of them)
-Aluminum strip
from a soda can (Faux rusted with iron paint, salt, and bleach)
-Metal stampings that I had on hand and a few "real" gears
-Vintage vacuum
tubes (Flea market...maybe $0.50 each)
-Scrap wire (On hand)
-LEDs (Snagged a while back from a surplus store. I think they were something like $0.79 for a package of 4. Colored with Sharpie marker to make them red and amber)
-Copper bezel with a broken bail
-Salvaged switch (Snagged a while back from a surplus store)
-Resin and glue
-Paper and cardboard (On hand, cardboard from my recycling bin)
-Promotional keyboard wrist rest (Freebie from work, painted)
-Various hardware
bits...screws, nails, washers, bolts (On hand)
Learning points:
-The fencing scrap was a fun material to work with. I expect that I'll use more of it in future projects. It cuts easily and maintains its shape nicely. The fan enclosure took me less than five minutes from measuring to completion.
-Fossilized marshmallows take spray paint well...but not liquid acrylic. I chipped the finish when putting in one of the eyelets, but since the Peep was already adhered to the base, I couldn't spray paint. I tried to touch it up with acrylic paint instead, but instead it started to melt. GAH!
-I'm still a clod with hot glue. *sigh* Just when my thumbprints were growing back.
------------------------------------
RAM's Fourth Annual International PEEPS® Competition kicks off with the Meet the PEEPS® Artists Event: Artist Reception, Awards Ceremony and Media Preview
Thursday, March 28
5:30 - 7:30 pm
Awards Presentation at 6:00 pm
The exhibit runs from March 29 - April 14, 2013 during regular museum hours. If you're in the area, please stop on by. Personally, I'm really looking forward to seeing what creative projects everyone did with their Peeps.

------------------------------------
RAM's Fourth Annual International PEEPS® Competition kicks off with the Meet the PEEPS® Artists Event: Artist Reception, Awards Ceremony and Media Preview
Thursday, March 28
5:30 - 7:30 pm
Awards Presentation at 6:00 pm
The exhibit runs from March 29 - April 14, 2013 during regular museum hours. If you're in the area, please stop on by. Personally, I'm really looking forward to seeing what creative projects everyone did with their Peeps.

Gone...but not forgotten
I was just going through some of my pictures from last Autumn and ran into a few shots from WindyCon. The con's theme was "Zombies", so I had made a bunch of creepy bits for the art show, most of which I've posted here or in my Etsy shop. Somehow, I'd missed these two pieces that had sold at the con, so I'm posting them now...


Saturday, December 29, 2012
Belatedly Windy
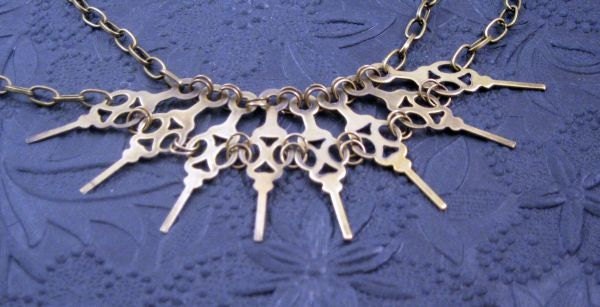
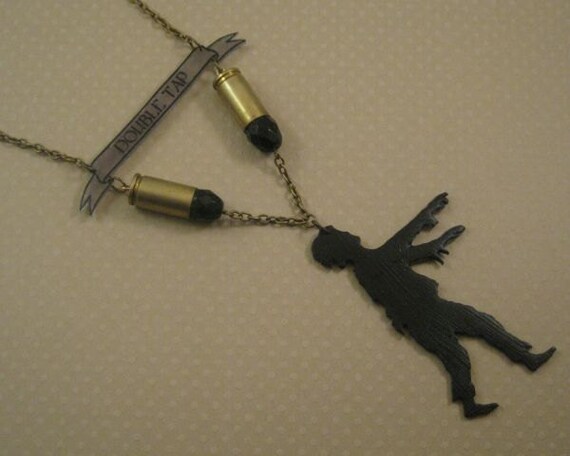
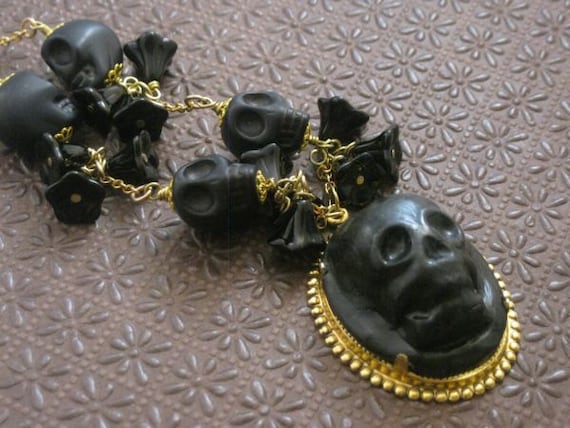
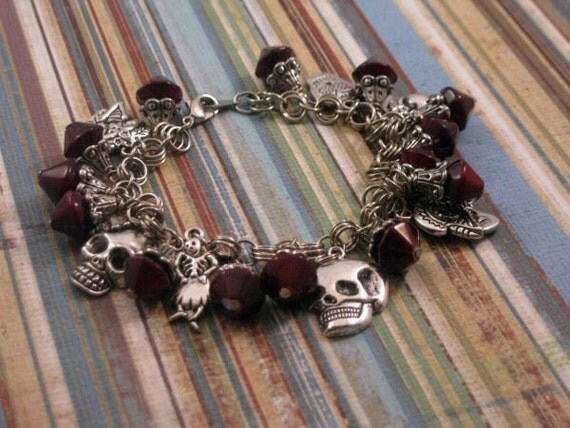
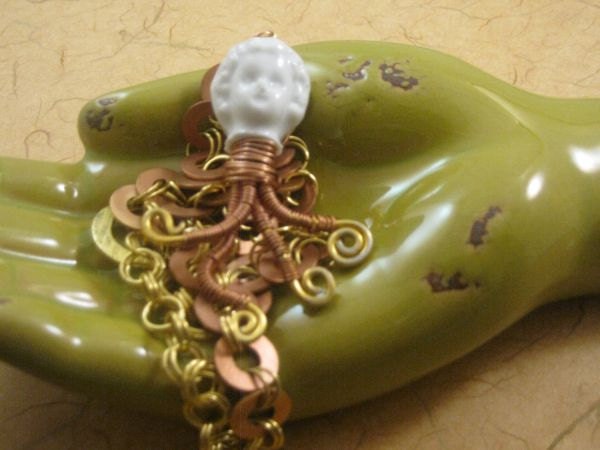
I *finally* had a few spare moments to post on Etsy some of the pieces that I did for WindyCon 33 back in November. This year's theme was "Zombies!". While I had a lot of fun at the art show, things were a bit slower than usual due to Chicago having been the host city for World Con in August. For more information about the pieces shown, click on the photos for a link to their Etsy listings or visit my shop.
 |


Saturday, June 2, 2012
New ring designs and a 20% off sale!

I’m running a special in my Etsy shop through Sunday, June 10th in order to offset an unavoidable expense. Use discount code FMC612 to take 20% off all in-stock pieces. This includes all of my recently posted brass and copper rings, charms, necklaces, chunky cocktail rings, earrings, barrettes, and more.
Do you like my work, but would prefer a variation on an existing item? Please contact me for special pricing on custom work through the June 10th sale span.
Friday, May 11, 2012
Special order

Sharing some hairpins that I made for a gal that found me via Etsy.
Hopefully, I'll have a bunch more items to share with you by morning!
Saturday, June 25, 2011
Fun Shopping!
I've been chosen as one of the Fun Shops of The Day for today.
Here are some nifty items from the other fun shops chosen today:
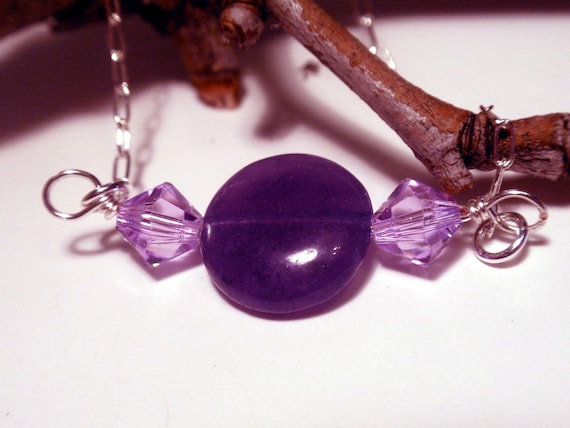
From Naama Taubenfeld Designs
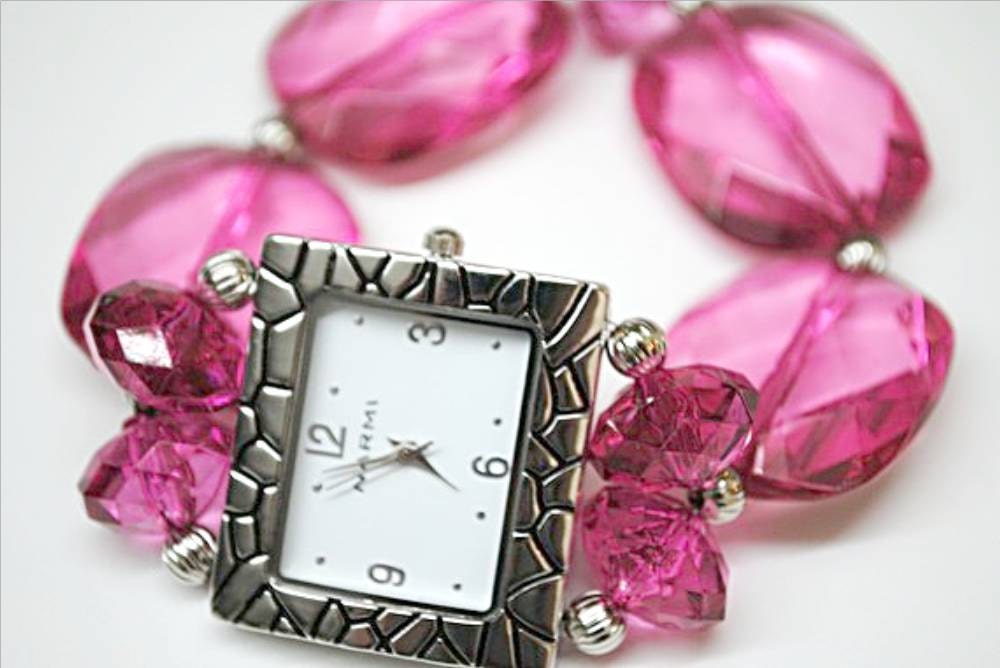
From Adornments by Amber

From Hypnoteyezed

From 1000 Miles
Here are some nifty items from the other fun shops chosen today:
From Naama Taubenfeld Designs
From Adornments by Amber
From Hypnoteyezed
From 1000 Miles
Subscribe to:
Posts (Atom)