Showing posts with label resources and tools. Show all posts

Tuesday, September 3, 2013

Mirror Mirror... (Aging Tutorial)


 Photo via HomeIdeasMag.com

 I’ve long loved the look of old mirrors, that effect of random pitting and flaking of the silvering, which shows little glimpses of the backing material. While I could always find actual antique mirrors for my purposes, they’re often A) rather expensive and B) hit and miss to be able to find just the right size/shape/weathering level for a particular project. I knew that there had to be a way of recreating this look and, after a bit of researching, I discovered that there’s actually two main techniques:
THE EASY WAY:

This involves using mirror effect spray paint and vinegar to create a sort of mercury glass look on plain clear glass. While this tutorial doesn’t explore this, I think that this might be interesting to try on a blue or other coloured transparent glass thrift store find (keeping my eye out for a red bowl amid the Holiday sales) to create a coloured mercury glass look.

THE HARD WAY:

This is the option that you’ll need to use if you want to age an existing mirror. It is messy and dangerous. As in, SERIOUSLY-SERIOUSLY hazardous without proper precautions. Really. Not. Remotely. Kidding.

Guess which option this post is about?
In the words of Tina Turner, “We don’t never do nothing niiiiice and easssssy…” (Actually…we do. Nice and easy would be preferable. In fact, it is actually the path of choice for us most of the time, but we just couldn’t resist the rare opportunity to use a Tina Turner quote. We also have decided to use the royal “we” for this paragraph. We will stop now.)
--------------------------------------

SUPPLIES:
-Glass mirror (with frame and/or board backing removed and set aside to be reattached later)
-Paint stripper (I used the spray kind, but there are also paste options)
-Muriatic acid (Even with a large mirror, you do not need much, so buy the smallest bottle possible)
-Plastic paint scraper
-Distilled water
-Several cotton rags, a few dampened with distilled water
-a roll of paper towels
-Sturdy drop cloth
-Two spray bottles, one for distilled water and one for muriatic acid (The one that you will use for the muriatic acid will not be reusable). Also, test the bottle for muriatic acid with water first to determine spray pattern. Spritzing on scrap brown paper like a cardboard box or grocery bag is a good way to see the spray pattern. Does it spray a mist or droplets? Is this the spatter pattern you want to make on the mirror? If not, find another bottle/nozzle that does create the look that you’re seeking.
-Sufficient newspapers to cover the dropcloth at least 5 layers thick for each chemical application
-Acid resistant gloves (I doubled up and wore another pair of gloves underneath)
-Protective goggles
-Respiratory mask for use with acids (dust masks are not effective against chemical mist/fumes)
-Clothing that will shield against splatters
-Hairband to secure long hair
-Optional but highly recommended: Another individual within earshot who knows what chemicals you are working with and has the number for poison control
---------------------------------
Before you begin:
  1. This project MUST-MUST-MUST be done in a VERY well-ventilated area…ideally outdoors. This is NOT a kitchen table project. Personally, I wouldn’t even do it in a basement or a garage unless the garage door was wide open. Make sure that all work surfaces are well protected. Keep kids and pets or even prone-to-do-stupid-things adults away from your work area until all chemicals are cleared.
  2. Take a quick moment to Google “muriatic acid” including what it can do to human flesh and particularly what it can do if inhaled. Now take another look at what you are using to protect yourself and objects from contact when using this chemical. Re-assess whether your precautions are sufficient in light of the really horrifying descriptions/pictures your web search yielded. Also know what to do in case of emergency. Muriatic/hydrochloric acid is not to be trifled with.
  3. Know what you plan to do with the rags, paper, excess acid, etc. when you’re done with it. What are the hazardous materials disposal processes in your community?
---------------------------
After protecting yourself and your work surface, lay the mirror face-down on the layers of newspapers. Spray or apply your paint stripper with a brush, following product directions. Depending on the stripper, paint should start to lift in 5 to 15 minutes. You’ll notice wrinkling and puckering of the paint, which indicates that it is lifting. Gently wipe the stripped paint away to reveal the silvering underneath. For difficult to remove paint areas, you can use the plastic paint scraper, being careful not to scrape the silvering off. Often it is better to just apply a bit more paint stripper to these areas and patiently wait for the paint to lift, rather than scraping harder and risking scratch lines on the silvering.
Once all of the protective paint has been removed, use your bottle of water to spritz the back of the mirror and wipe all paint stripper residue off with the paper towels. Ensure that no paint/paint stripper has seeped around the edges of the mirror and onto the front. If it has, clean those areas before the gunk has dried. This is also a good time to replace the soiled newspapers with clean and dry ones, in preparation for the next step. Allow the newly de-nuded mirror to dry.
Very carefully pour a small amount of the muriatic acid into the spray bottle that you have designated for this purpose, making certain not to be in the path of any fumes that may rise from pouring. When I opened my acid bottle, there was a foil seal at the opening. Rather than completely removing the seal, I poked two holes across from one another (like a colon- : ) . This allowed ventilation, so that when I poured from the “bottom” hole, the acid didn’t glug or slosh. Pour slowly and steadily to eliminate the possibility for spills.
Use the spray bottle to apply the acid to the areas that you would like to age. Any of the silvering that the acid touches will be lifted, so apply sparingly at first. Remember, you can always remove more (but not add) to the silvering. Let the acid sit for a minute or two, then using the dampened cotton rags, blot the liquid beads. Just blot. Don’t move the rag in circles, lines, or drag the rag in any way. This will smear the acid and muddle the spray pattern. Once all of the acid has been completely soaked up into the rag, allow the glass to air dry. After the glass is dry, use the water bottle to spritz the areas where the acid had been sprayed, allow the water to sit for a minute or two, then blot again (with unused rag) to remove acid residue and allow to air dry. (If there are water spots on the silvered side of the mirror after the second blotting, rinse mirror with a stream of water and gently wipe dry). Properly store/dispose of remaining acid and materials (newspapers, rags, gloves, etc) that it came in contact with, per your local hazardous materials requirements.
Once the mirror is dry and free of acid, you’ll need to apply to the back of mirror whatever you plan to have show through the gaps in the silvering that you have created. The traditional choice would be black paint to mimic a naturally aged mirror. Another option might be a contrasting metallic paint or leaf, such as copper or gold. Protect the paint and exposed silvering with cardboard or veneer cut to fit and reattach frame.


For the piece above, I used a small 5" mirror from the dollar store. These work well, and at their inexpensive price, they're good for experimentation before moving on to bigger mirrors.

After aging the mirror tile, I backed it with black paper and adhered it to a circle of pine using Liquid Nails. The black paper peeps through in the areas where the acid removed the silvering. I painted the wood mounting for the mirror black and added a simple sawtooth hanger on the back. Using epoxy, I added a ring of erratically shaped blued steel tacks to the rim of the wood to make this little accent mirror a bit more eerie and forlorn.


Since I knew that wasn't going to go through this aging process frequently,  I treated several mirror tiles at once to have a supply stash to work from. I'm certain that they'll be popping up in more elaborate works to come.

Saturday, April 6, 2013

Hula Hoop Rug (with suggestions and improvements)

Now that Spring is here, I've been considering snagging a tool for a tutorial that I'd pinned several months ago. That's right...it's HULA HOOP SEASON! The hoops that I've seen at the dollar store are far too flimsy to hold up for my purpose, but I've spotted a few at other discount, craft, and hardware stores that seem to be sturdy enough to withstand use in this project. I think I may snag a $5 one at Michael's this weekend.

This tutorial on Spoonful.com by


Goodwill Outlet Store in Appleton, Wisconsin that offer textiles and other materials at a flat rate per pound.

-Freecycle "want" posts: Since old clothing  IS something that will often end up in a landfill, it's something perfectly rational to ask for. Be forwarned though, practice good judgement when meeting other Freecyclers to pick up items. Most Freecyclers will leave their items out on their front porch/in their mailbox/by their front door for pick up. Entering a stranger's home is unwise.

-Group sourcing: While this is obvious, I'm going to mention it anyway. Let your co-workers/family/friends/etc know that you're collecting old shirts. If someone gives you a ton of discarded shirts, a nice "thank you" might be a rug of their own.

Tuesday, April 2, 2013

Waiting for the flowers


Until actual flowers start blooming around here in Wisconsin, we'll have to settle for faux ones. These are some of the ones that I had made last October for El Dia de los Muertos. Want to make your own? Try this super easy tutorial:


Friday, March 29, 2013

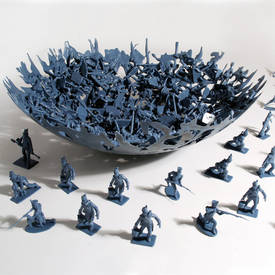
DIY Plastic Figure Bowl Tutorial


In addition to being cool geek art, I thought this melded plastic figure bowl would make a great alternative to the traditional Easter basket for those kids or "big kids" that aren't the pastel basket or bucket sort.

Unfortunately, the site where I found the photo that inspired this project didn't actually explain how this piece was made. Rather, they offered a link to a project describing a slightly different result (3D interior, flattened exterior).


While this is fine if this is the look that you're going for, the tutorial also advises using your oven to melt the figures. This likely is NOT so fine as various commenters have suggested, since even with a fairly well ventilated kitchen, you'll be releasing some pretty noxious chemicals into your house.

While there's a link in the original post that suggests a safer/more even alternative, it doesn't actually lead to that explanation. I figured it out, though...and my solution also solves the fully-3D-on-the-outside-any-flattened-surfaces-on-the-inside question.


Supplies:
-Pyrex bowl (use heat resistant glass for safety)
-Various plastic figures (I found mine at Dollar Tree, 48 in a package)
-Heat proof surface (ext: wire grate elevated a few inches above a cement walkway or even bricks placed together to form a pad. There should be some ventilation from beneath the bowl and the holes in the grate/spaces between the bricks will allow bits of the figures to extend beyond the edges of the glass bowl )
-Heat tool (the sort used for scrapbook embossing and shrink film that goes to about 400 degrees...not a heat gun for stripping paint)
-BBQ tongs
-Safety glasses and dust mask (for precaution)
-Outdoor space (Don't do this indoors)


Process:

Place Pyrex bowl upside down on the heatproof surface. Take two figures and lean them against the bowl overlapping one another a bit. At the lowest setting (to start, increase heat if needed), use your heat tool to melt where they touch to form a joint(s). Take a third figure and fit it against the melded figures to see where it would join. Remove that figure and heat that point, then use that still-molten point to stick back in place to meld with the first two figures.  Work your way around the whole Pyrex bowl that way.

As you go, you'll want to make sure that the figures are melding securely, Holding the heat tool in one hand, use the BBQ tongs to smoosh the figures together to meld, Cool bowl and figures completely, then gently detatch the melded plastic from the glass where it may have adhered. If a join breaks when the bowl is being removed, use your heat tool to re-melt the joint.


You'll notice in this shot that there is a bit of flattening on the inner wall, but the exterior is still very 3D.


As you can tell, the melted plastic is quite rigid. The more contact points that you meld, the sturdier it will be.


Ta-DAH! Completed bowl, top view


 Additional Notes:

-Don't limit yourself to Army men. There are a TON of different options of bagged plastic figures at the dollar store and where party favors are sold. How about dinosaurs? Bugs? Farm animals? Cars or other vehicles? Close to Halloween, you might even find glow in the dark versions!

-Can't find the color you want? Finished bowls can always be spray painted. You can even add a sprinkle (or coating!) of glitter. Use a spray sealant to protect any color or sparkle from flaking or chipping.

-Because of the cheapy non-food grade nature of the plastic and the fact that it was further melted, I'd be a bit leery of putting unwrapped food in direct contact with the toy bowl. (I know...the toys are supposed to be tested as child safe, but speaking as someone who worked with procuring inexpensive import toys for a few years, LOTS of bad stuff slips through). A liner of some sort or just regular wrapping on the food (ie: the candy's packaging if using as a treat bowl) should be fine. Also, thoroughly wash the Pyrex bowl (and tongs) after using it as a mold to remove all residue.

-For a less porous bowl, use the same technique from the first layer to add additional layers of figures, melding the consequent layers onto one another.

-I know this goes without saying, but THIS IS NOT A SAFE-FOR-KIDS-TO-DO PROJECT! Despite this bowl being made out of toys, melting plastic and a heat tool will burn little fingers. If you can manage using a glue gun, you should be able to handle this project unscathed, but accidental burns are always a risk.


Wednesday, March 27, 2013

Free The Amigurumi!

 From A{mi}Dorible Crochet.com
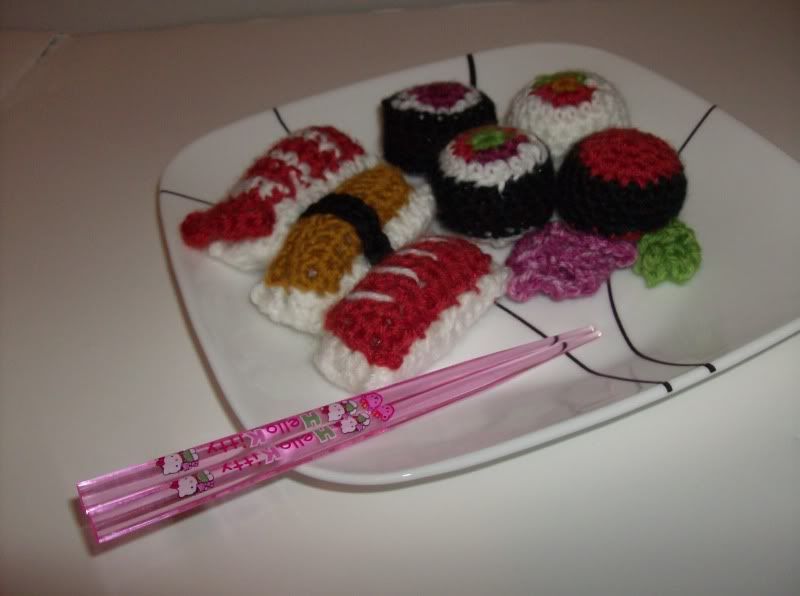
As previously stated, I am not a fiber artist...but that doesn't mean I'm not amazed by all of the nifty stuff that my fiber peeps create. The other day, I ran into the motherlode of freebie amigurumi projects. The Great Amigurumi boasts 1500 (yes...FIFTEEN HUNDRED!) free amigurumi patterns. Some favorites of mine:


Daryl Dixon (Walking Dead) from Nicrochet


Sushi from StitchLove

Nibbler (Futurama) from Hooks and Needles


Sunday, March 24, 2013

Train-of-thought tutorials using repurposed Easter items


Sometimes things just fall together in interesting patterns.

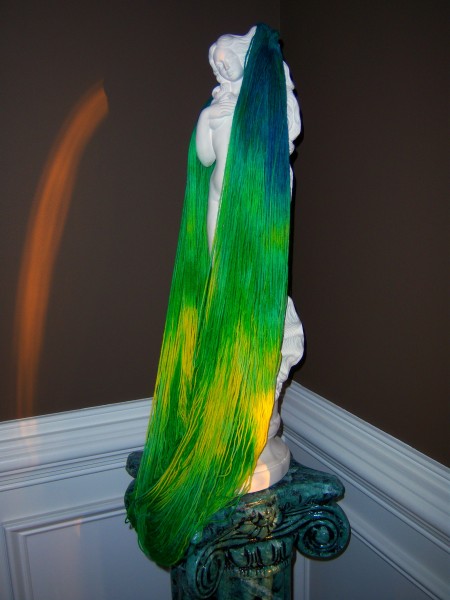
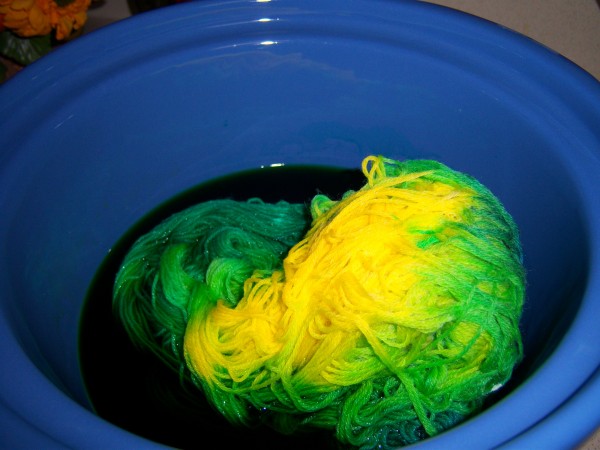
Case in point: Earlier today I was poking through some tutorials and came upon a really nifty project on Suzy's Artsy-Craftsy Sitcom for using Easter egg dye and a crockpot to hand color wool yarn.

Worth noting since spring is (theoretically) here, the thrifts should be clearing out all of their (ravel-able) wool sweaters and already-cheap Easter egg dye is going to be 75%-90% off in another week and a half. Might be an idea for cheap repurposing project experimentation for those so inclined.


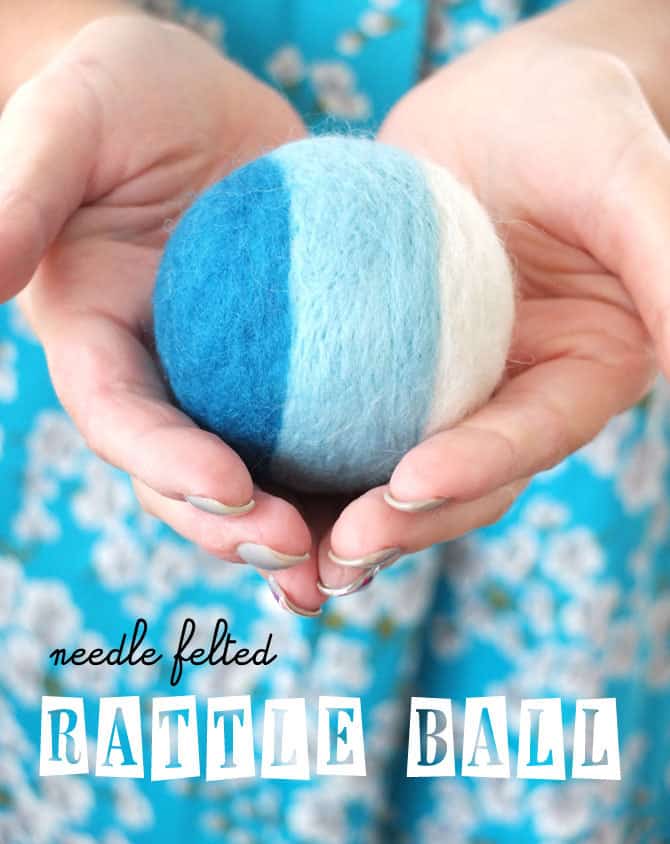
...And later ran into fiber art project at Prudent Baby involving ANOTHER repurposed Easter clearance item: one of those plastic fill-able eggs to contain the bell in the center of the rattle. A good idea to make your amigurumi jingly too.
 Now to confess, I don't actually do the fiber art thing. I have tons of friends who do, so I do notice nifty yarn-y stuff when I run into it. 

For those of us who'd like to make a soft rattle but don't knit/crochet, yet have basic sewing skillz, I also saw this project on Handmade by Jill using ready-made cotton socks. This would make a terrific handmade baby shower gift.

See? Funny how things run together! 


Wednesday, January 25, 2012

She's a scrappy gal, she is...

 
During my undergrad years, I used to frequent The Scrap Box in Ann Arbor. It was a fantastic place where manufacturers would donate their (clean) scrap items from their factory processes to be sold to the community. There would be bins of such things as little plastic rectangles, one inch foam circles, and orange widgety bits with peel-off adhesive backs.  Most items were sold by the mix and match fill-it-yourself bag with some items (like sheets of vinyl) sold separately. It was always a great source for cool/cheap/odd art supplies for the kids at the shelter where I worked and I’d also go looking for materials for curriculum/creative projects with friends who were occupational therapy, art, or education majors.

Since it had been several years since I’d visited The Scrap Box, I wondered if it still operated and I also wondered if there was a similar program in the Milwaukee area. The good news is that, yes, the Scrap Box is still running strong:
  (Incidentally, The Scrap Box also has a blog over at WordPress) 

Alas, there’s not a similar program in Milwaukee…or at least none that I could find…that offers post-industrial materials in a user-friendly setting for artists and crafters (though we DO have American Science and Surplus, which is a different flavor of awesome). There is also a Scrap Box-type program in Chicago (The Creative Reuse Warehouse via the Resource Center Chicago), which I’ll have to check out when I’m down that way.

While Milwaukee currently lacks this sort of recycling program, I found a TON of similar programs throughout North America.  Obviously what each center has can vary by region and even day-by-day, but I sure that they’re all well worth checking out for great repurposable art parts.

ALABAMA            
Mobile                        
-GRCMA-The Resource Place 

ARIZONA            
Tempe                        
-Treasures for Teachers 

BRITISH COLUMBIA
Vancouver
-Urban Source

CALIFORNIA  
Long Beach                
Los Angeles               
-Trash for Teaching, Inc                           
Mountain View          
-FabMo                           
Oakland                     
Palo Alto                      
Riverside                    
-Riverside Arts and ReUse Exchange         
Roseville  
-ReCREATE                 
Sacramento                  
San Francisco             
-SCRAP (Scrounger's Center for Reusable Art Parts)
San Jose                     
-Resource Area For Teaching (RAFT)--Main 1
Santa Barbara             
-Art from Scrap
Vacaville                    
-Center for Imaginative Reuse

COLORADO       
Boulder                      
-ArtParts Creative Reuse Center
-Center for Creative Reuse      
Colorado Springs       
-SCRAP UP
Denver                       
-RAFT--Colorado         

CONNECTICUT    
Bristol                        
-Imagine That! at the Imagine Nation Children's Museum
Hartford                      
-Scrap-it, A Creative Reuse Center

D.C                      
Washington, DC         
-SCRAP-DC   

FLORIDA         
Ft. Lauderdale                       
-Kids in Need Resource Center
-Trash to Treasure
Melbourne Beach       
-Reusable Resources Adventure Center                         
North Miami                          
-Ocean Bank Center for Eduational Materials                          

GEORGIA           
Atlanta                       
-WonderRoot Creative Reuse 
Carrollton                   
-The Scrap Bin

IDAHO               
Boise                          
-The ReUse Market

ILLINOIS           
Champaign                 
-The I.D.E.A. Store      
Chicago                      
-Creative Reuse Warehouse     

INDIANA            
Bloomington              
Franklin                      
-Creative ReSources
Hammond                  
-Hammond Recycling’s Art & Crafts ReUz Station
Indianapolis               
-Teacher's Treasures     

IOWA                
LeClaire                     
-Reusable Usables Creative Arts Center 

KANSAS              
Kansas City                
-Recycled Materials Center, Children's Museum of Kansas    

LOUISIANA        
New Orleans              
-Recycle for the Arts, a program of The Green Project           

MAINE              
Auburn                       
-SHAREcenter
Farmington                 
Scarborough               
-Ruth's Reusable Resources     

MANITOBA
Winnipeg
-ArtJunktion

MASSACHUSETTS  
Boston                        
-Recycle Shop, Boston Children's Museum
Cambridge                 
-Extras for Creative Learning (EXCL)        

MICHIGAN      
Ann Arbor                 
-The Scrap Box
Detroit                         
Grand Rapids             
-Learning from Scratch            
Lansing                     
-Creation Station          
Traverse City              
-SCRAP--Traverse City        

MINNESOTA    
Mankato                     
-Art Bin at the Children's Museum of Southern Minnesota
St. Paul                       
Bridgeton                   
-Kidsmart  
Crestwood                 
-St. Louis Teachers Recycle Center
St. Louis                    
-The Upcycle Exchange {Materials Market}
  
NORTH CAROLINA  
Asheville                    
-Trash , Inc.
Cary                          
-Cary Creative Center
Durham                      
-The Scrap Exchange
Hickory                       
Albuquerque              
-Wemagination

NEW YORK        
New York                  
-SHHHH Salvage Projects
Queens                                  

 OHIO                 
Cincinnati                  
-Crayons to Computers
Columbus                   
-Waste Not Center
Toledo                        
-Scrap4Art       

OKLAHOMA      
Oklahoma City          
-Save it for Art 

OREGON           
Eugene                      
-MECCA           
Portland                                 
Lancaster                    
-Lancaster Creative Reuse       
Philadelphia               
-The Resource Exchange       
Pittsburgh                   
-Pittsburgh Center for Creative Reuse
   
RHODE ISLAND                 
Providence                 
-Resources for RI Education  

TENNESSEE        
Nashville                    
-Turnip Green Creative Reuse

TEXAS                   
Austin                        
-Austin Creative Reuse
Denton                       
-SCRAP Denton
Houston                     
-Texas Art Asylum

VIRGINIA              
Richmond                  
-Stuff, Inc.      

WASHINGTON        
Lynnwood                 
-Creation Station
~~~~~~~~~~~~~~~~~~~~~~~~~
Support your community’s art and recycling movement! 
(As always, linking to this post is more than permissible.)

Sunday, December 18, 2011

Finely aged Wisconsin cheese

I really need to get in gear and prepare for vending at Midwinter Gaming Convention next month. Sooo...of course...I'm not. Instead, I'm goofing around on the web (I'm also actively procrastinating about cleaning my apartment).

In my procrastinatrix wanderings online today, I found this: Vintage Wisconsin Dells, a growing archive of photos and other images from the village of the tourist trap.


Right now, there's about 3100 images in the archive and they're actively soliciting more submissions via the site. I am a HUGE fan of vintage amusement memorabilia...and antique photos...and Midwestern regional history...and kitsch, so I've really enjoyed poking though the archive. Looking forward to seeing more images as this grows!

Monday, November 7, 2011

Are you a Displaced Victorian?

...or would you like to be?


 I just volunteered to be one of the team leaders on the Home For Displaced Victorians Etsy Team. Per the team description:

This team is for etsy members who love all things Victorian. From clothing to literature, this team is really for everyone who appreciates the Victorian Era. Displaced Victorians welcomes sellers and buyers!! So if you feel like you're living in the wrong century...hop on board!! The train to 1890 is boarding now!!

So...Poe fans?...Dickensian carolers?...Steamy sky captains? I know I count your ranks among my readers. Come on along!

Saturday, November 5, 2011

New discount art supply site

I just received an e-mail this morning about a new discount art/craft supply site in the vein of Groupon: Blitsy . They're just getting started, but it might be worth signing up for updates.

Monday, October 31, 2011

Hey fellow Etsians!

It appears that I've unexpectedly inherited the captain's post for two Etsy teams. Please take a peek at the below team pages and, if you're so inclined, join up!
For those who create or appreciate adornments of an ancient flair. Whether historically accurate (artifacts) or fictionalized (art-of-fakes), all are welcome.
Open to any artisan residing in the Midwestern US. All media accepted. Supportive, encouraging, non-competiti­ve.

Saturday, October 29, 2011

Online art marketing resources

Next month, I'm going to be a part of a panel discussion at WindyCon (http://www.windycon.org) regarding online marketing for artists and crafters. Since I'll be sharing the following resource list with panel attendees, I thought it might be of interest to my blog readers too:
************
I've broken the list entries into their best-defined categories, but as you're browsing, you'll notice that many of the sites linked will overlap categories. Some of the marketplaces will have social media elements, some galleries will allow sales, etc.

Marketplaces
Fees on these sites will vary from a flat dollar rate per month, to a percentage of each sale, to a combination of both. A few are even fee free. All have their pros and cons. A big site may have a lot of traffic, but your work might get lost in a sea of similar items of that genre, whereas your work might shine in a smaller marketplace...but that might not matter if the site has low traffic.
Handmade Artists Shop http://handmadeartistsshop.com/

Fulfillment Sites
These sites enable you to sell your 2-D art images...in print form or applied to other objects (wearables, household items, etc)...as produced by the online retailer. In most cases, the artist receives only a portion of the sale price or a flat payment, but does not have to worry about stock overhead or shipping items.
Fine Art America http://fineartamerica.com/

Social Networks
Most...if not all...are free to use. These can be invaluable for driving traffic to your marketplace and as well as providing networking opportunities.
Artisans/Jewelry Designers http://artisanjewelrydesigners.ning.com/
Attack of The Craft http://www.attackofthecraft.com
Everything Etsy Directory http://directory.everythingetsy.com/
Milliande Art Community http://milliande.ning.com
My Art Plot http://www.myartplot.com/

Virtual Galleries
Online portfolios are great for showing your range and a convenient way to showcase your art. Many of the previously mentioned social network spaces and marketplaces also offer gallery spaces, but those below focus primarily on this function.
Digital Consciousness http://digitalconsciousness.com/

Blogging
Whether you're writing in your own blog or contributing to a larger collective blog space, the key to getting noticed is to pique the interest of your readership. Talking up your own work is fine, but ad copy can get tedious after a while. Tutorials, stories, useful tools (er...you know...like a list of resources...) and other nifty bits keep people reading and SHARING, which in turn gets you and your art more exposure. Some examples of blogging spaces include:

Simply Paid Advertising
While this can be costly, a well-placed ad can send a ton of potential buyers your way. Many of the marketplaces, galleries, social networks, and such above offer ad space, but research and choose carefully. Make sure you're not throwing money into an ultimately fruitless shotgun spray approach. The sites below offer numerous options that can be targeted to the audience you wish to reach and your budget, but there are obviously countless other avenues all over the web that offer paid ad space.
The Handmade Directory http://thehandmadedirectory.com   
Unique Indie Shops http://www.uniqueindieshops.com/

Coupons/Discount Sites
Personally, I have mixed feelings about marketing via coupons and discount programs being applied to handmade goods and art. I think that a lot of consumers have been conditioned by large retail outlets to EXPECT everything to be discounted in some way as a part of our mass-produced disposable culture. IMHO, this devalues handcrafted goods to judge them on the same pricing standard of big box retail stock (and yes...technically...the sweatshop-made goods that are found at MegaSavLoMacroMart are oft handcrafted too.). That said...coupons and discount sites DO exist for the handmade market and some artisans have found benefit using such tools.

Etsy Coupon Code http://etsycouponcode.com/

Other Ideas
-Donate a piece of your work to an online charitable event such as a website-based silent auction fundraiser. Most charities are more than happy to include a link to the donor's online shop/site in the donation description. Not only does this get your work/name in front of people who might not otherwise encounter your work, you're helping a cause you believe in/the donation is tax-deductable.

-Post video or text tutorials on Instuctables (http://www.instructables.com/), craft websites (ex: http://www.craftytips.com), YouTube (http://www.youtube.com/), etc. Obviously, you don't want to explain how to copy your work, but as an artist, you likely have a lot of nifty skills that you can show off and help others in the process. Know how to seamlessly blend Copic marker coloring in illustrations? Be the reference that others link to!

-Utilize Amazon wish list (http://www.amazon.com/wishlist/vendor-button) and other wish list site links on your gallery/marketplace listings.

-Offer gift certificates via emailed PDF for last minute shoppers (Keep track of numbers on certificates to ensure that they are only redeemed once.)

-Banner swapping with other blogs/online shops

-Get involved in the online presence of local/regional community-based craft groups/art collectives/maker spaces (websites, blogs, etc)
************
Obviously, the above isn't meant to serve as a comprehensive list and I anticipate that there will be further additions after the convention panel. If you'd like to contribute your own links and ideas to this post, please do!